


Each monthly set has a surprise theme and this month's theme is 'Boho'. As you can see, it's not just wood, ceramic, metal and faux semi-precious beads, there's waxed cotton cord in there along with some other really interesting findings too.

The beads are all separately packaged inside a black satin drawstring bag and each theme comes with its own challenge written on a postcard. If you upload an image of your creation to their Facebook, Twitter or Instagram pages there's a chance to win your next box for free - which all adds to the community feel of a subscription box like this.
Once everyone has had time to play with their beads, more information about the contents of all the boxes, past and present, are posted on the Blueberry Cove Bead website. Ideally I'd love to have a bit more information on how to purchase more of the beads in the subscription box I received. For example, I can see many uses for the silver metal drop pendants, but I can find no way of finding out where to get them from in the future.
---
I must confess that I may have let out a tiny squeal when I saw the amount of waxed cotton cord in the box. I knew exactly what I was going to do first!
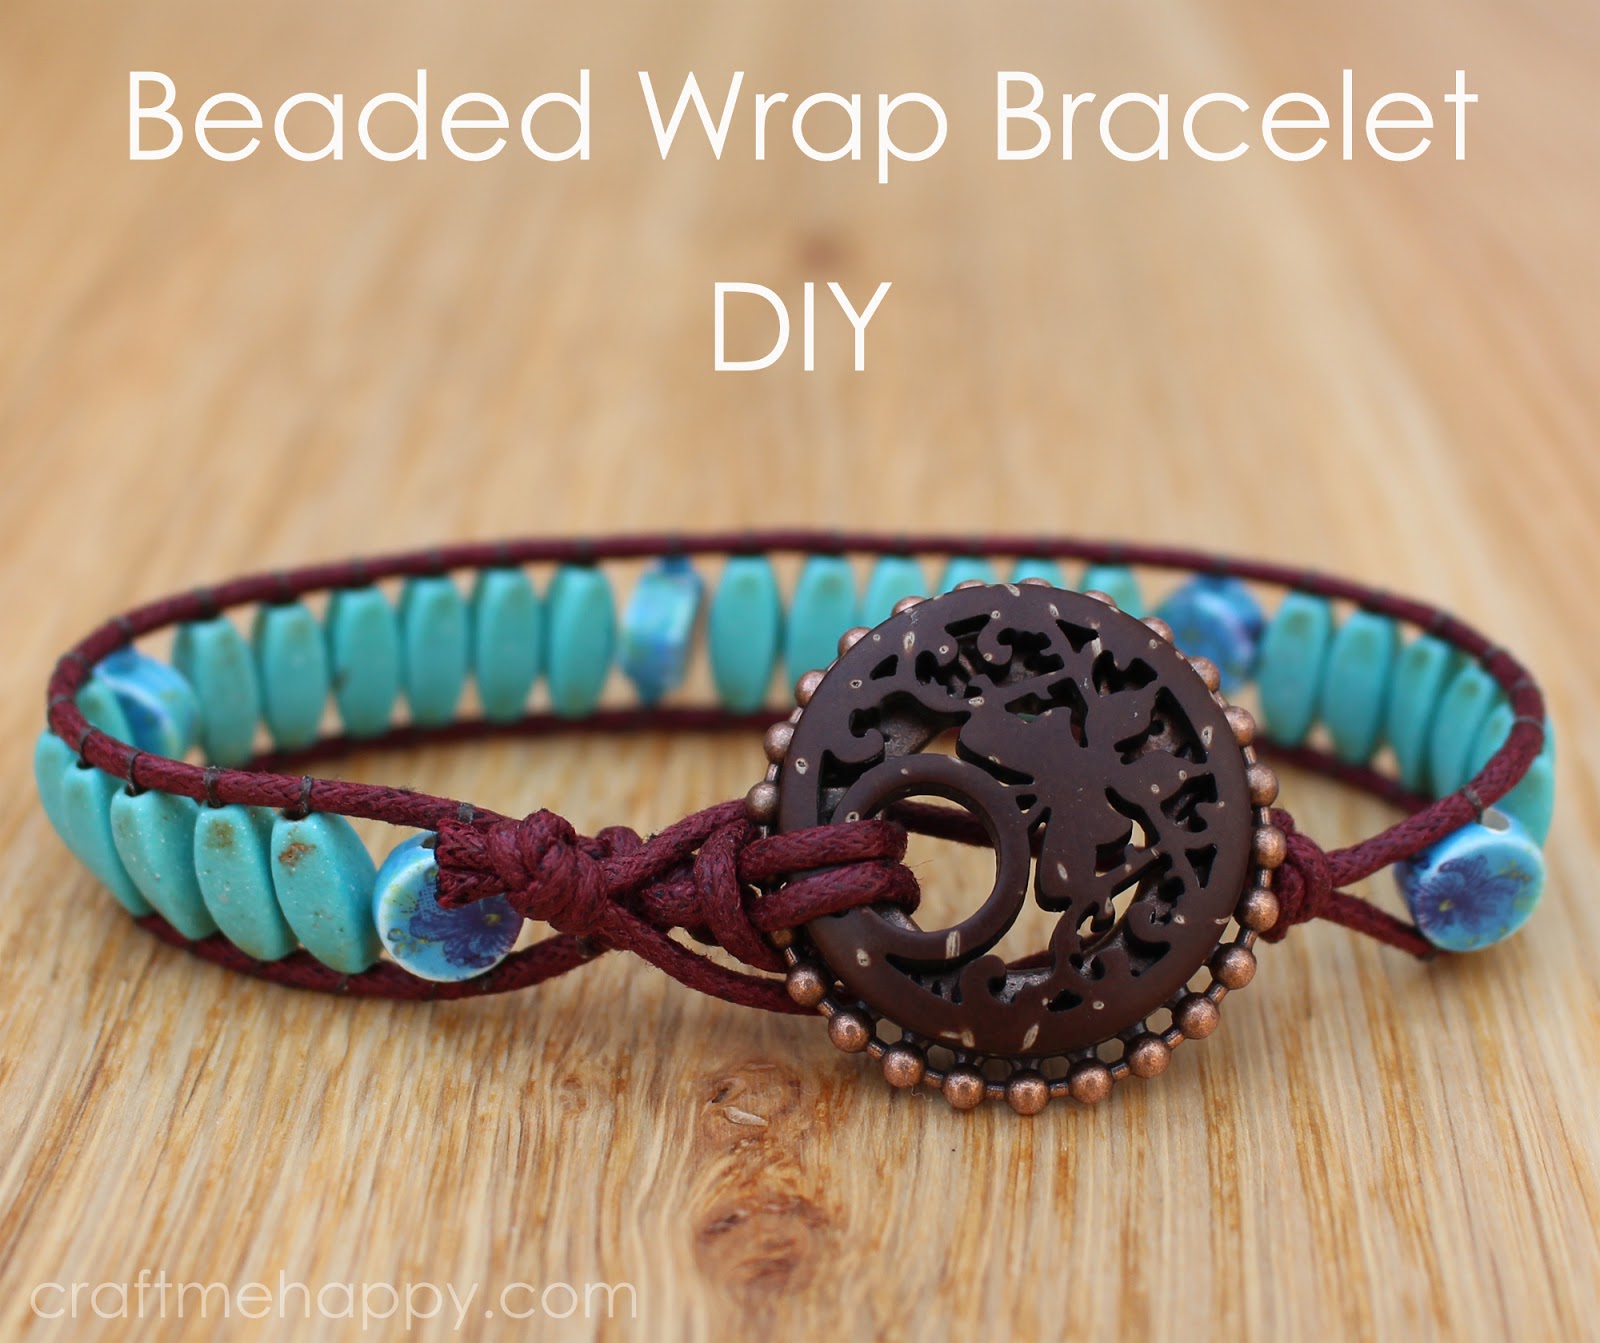
I love wrap bracelets and the Boho theme lends itself perfectly to this style of jewellery. I'm really drawn to the turquoise looking long beads. The small round blue ceramic beads are so pretty too. From a distance the design looks quite abstract, but when you look closely you can see little blue irises painted on them. So sweet! I'm going to combine these two beads to make a single wrap beaded bracelet :-
How to make a single wrap bead bracelet -
You will need:-
- A board or tray to attach your cord to. A clip board would work well too.
- About 75cm of 2mm leather or waxed cotton cord should be enough to make a bracelet that will go around your wrist once.
- Tape or bulldog clip to attach your bracelet to the tray or board.
- A large button or round bead to use as a fastener.
- About a metre of beading thread.
- A needle.
- Scissors.
- Beads.
- Glue for securing your knots.
Measure your cord and cut it to length. For a single wrap bracelet 75cm should be ample.
If you are using a button, thread the cord through the holes and secure it in the centre of the cord with the cords at the back of the button. I'm using the large round metal disc layered with one of the decorative wooden discs on top as a fastener.


I folded the cord in half, threaded the fold through the hole from the front to the back and then passed the cord through the loop, pulling it tight to form a knot.
Knot the cord close to your bead or button several times to secure it in place.

I taped the bead to a tray to secure it in place and make it easier to get under and around it. Many beaders use a clipboard for this but I find that a tray serves two purposes - it holds the cord in place, allowing you to get under and around more easily. The tray is also a great place for keeping the beads you are working with close at hand and under control.
Cut a length of beading thread and thread it onto a needle. I've cut mine to about 1 metre long.

The first bead needs to be more securely attached than the rest of the beads. With your needle pointing into the centre weaving area, thread on your first bead and take the needle through the cord on the opposite side.


Take the needle over the left hand cord and thread the needle back through the bead.


*Thread a second bead onto the needle and push it all the way to the cord. Pass the needle and thread under the two cords; position the bead between the two cords. Now push the bead upwards slightly so that the bead holes are above the cords ...

...coming over the left cord, pass the needle and thread back through the bead from left to right.** The bead weaving technique is repeated from * to ** until your bracelet is the desired length.

...coming over the left cord, pass the needle and thread back through the bead from left to right.** The bead weaving technique is repeated from * to ** until your bracelet is the desired length.
To prevent the beads from bulging, slipping or gapping, work a small stitch into the right cord after every 5th bead or so, then continue with the weaving pattern. Also, don't 'squash' the beads together, but try to leave a fraction of a mm between each bead.


I love the casual style of this bracelet so much that I decided to make a simple necklace to match. What do you think? It's quite different to my usual style of jewellery, but that's part of the beauty of a subscription box - it encourages you to try projects outside of your comfort zone.

If you wish to add different sized beads, the size change needs to be gradual for it to remain neat.
Wrap bead bracelets look great with blocks of different colours and varying bead sizes. It tends not to work so well adding just one smaller bead between two larger ones though. I loved the pretty round ceramic beads with a subtle flower pattern, however when I tried to add a single round bead and then continue with the bigger turquoise beads I was getting an ugly gap where the beading thread was showing between the cord and the bead. To solve the problem I added a couple of tiny seed beads on either side of my round bead to bridge the gap for a much neater finish.

Keep trying on your bracelet to make sure you get the perfect fit. You want your beads to wrap comfortably around your wrist, just stopping when they meet the large bead or button.

When your bracelet is as long as you want it to be, tie a knot in the cords close to the last bead.

To make your fastening loop, knot the cord again further down, making sure that the loop will slide snugly over your large bead or button.

Finally cut the cord close to the final knot. You can add a drop of jewellery glue to the knot and any thread ends for extra security.

Enjoy wearing your bracelet!

---
Even if you take out the pieces that I may not use, I still think it represents good value for money. Monthly membership costs US $22 plus $5 shipping to the US and Canada. At the moment they're currently shipping to just the US, Canada, Australia and New Zealand.
Full disclosure: I was sent a free box of Blueberry Cove Beads to test and make something out of. This post is not sponsored by Blueberry Cove Beads and all opinions are my own.
This review first appeared on the Cut out and Keep website as part of their
"Craft Test Sidekicks" series.
----------
Please be sweet and share the love. Leave a comment, subscribe to my YouTube channel, like my Facebook page for regular updates or follow me on Pinterest, Bloglovin' or Instagram
No comments:
Post a Comment