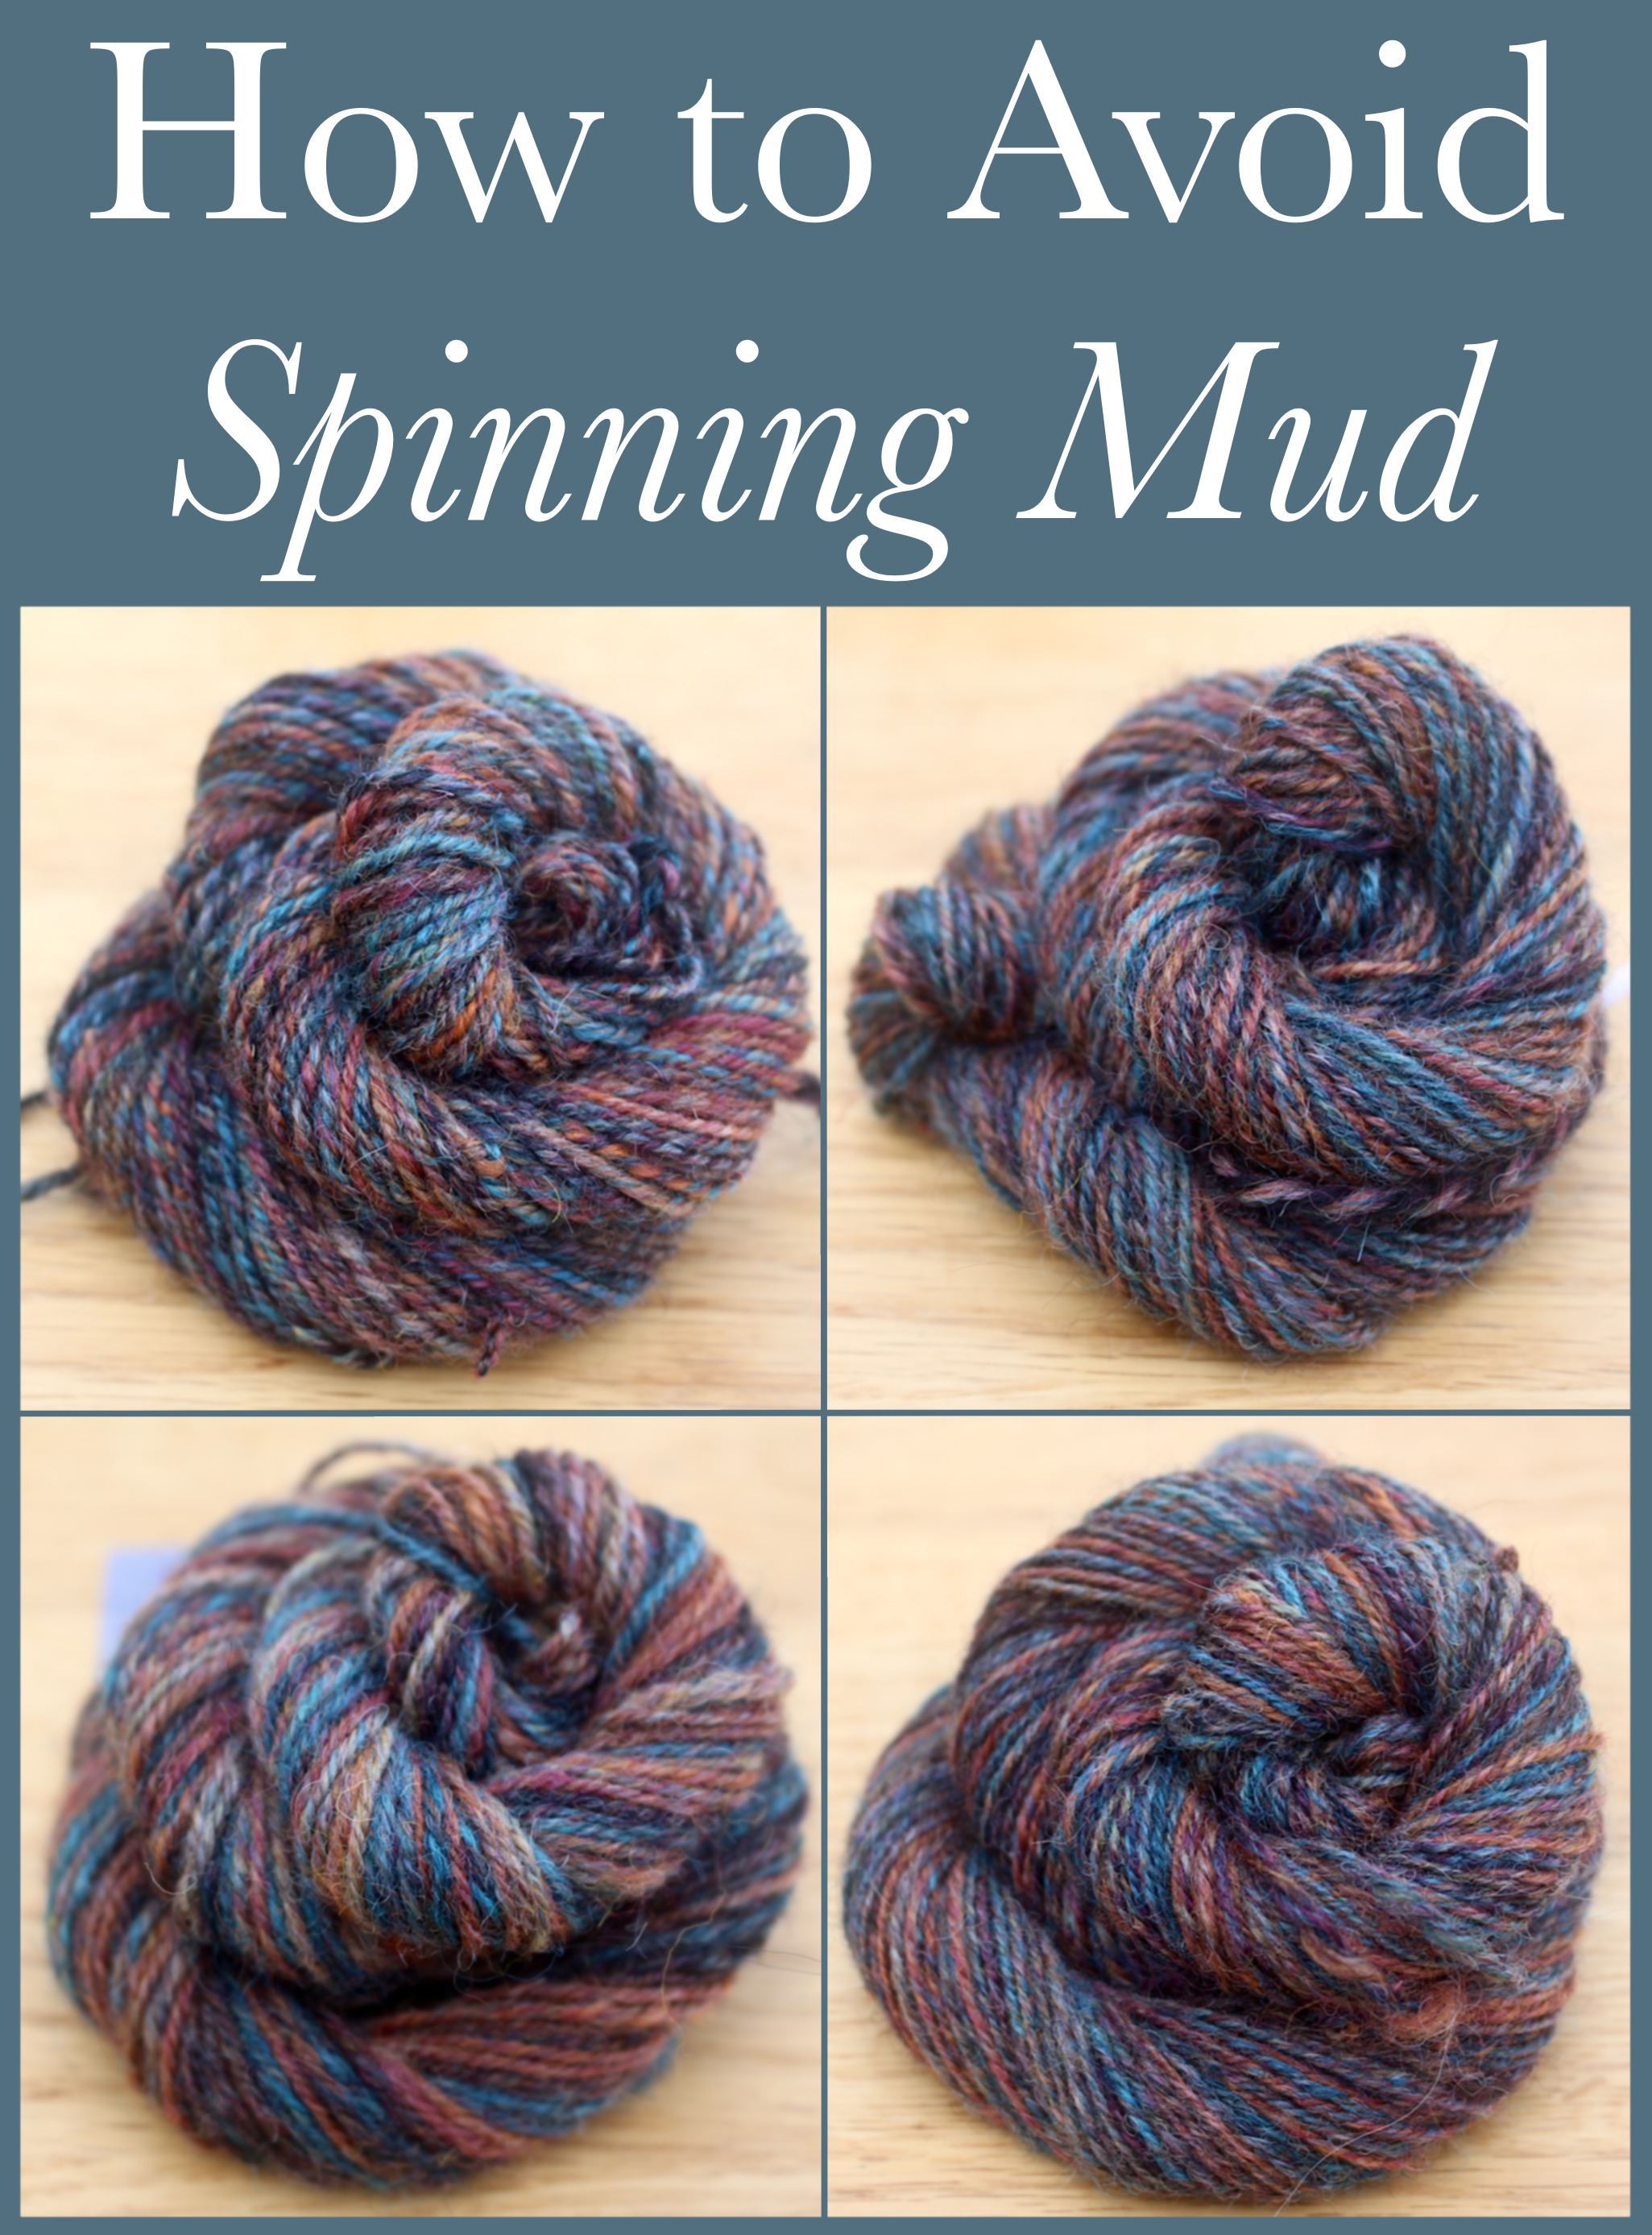
9 Different Ways of Spinning a Multi-Coloured Blended Top, While Trying to Avoid "Spinning Mud"
“I don’t want to spin mud” - This is a very common phrase uttered amongst hand spinners and it refers to the frustrating phenomenon of buying the most beautiful, multi-coloured blend of fibres, and then spinning a yarn from it that, from a short distance, looks like a murky brown or dirty grey colour.
It’s gorgeous, and if I’d spun it using a drafting or preparation method that would have kept those colours separated, I would have achieved a beautifully variegated yarn…
Unfortunately, I blindly drafted it all and then spun it from the end using a short forward draw.
My resulting yarn came out a slightly disappointing dirty green colour.
I achieved this muddy result due to optical blending - when two or more small areas of colour are repeated, very close together, the eye doesn’t perceive them as separate colours, but instead blends them together.
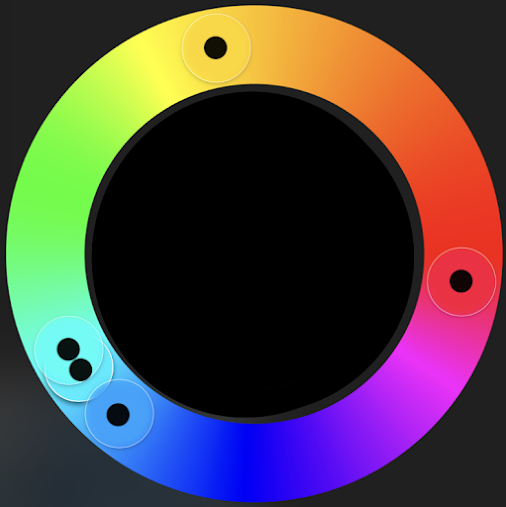
Plotting the colours from Over the Rainbow on a colour wheel
If I’d actually stopped to think about it, basic colour theory would have told me that any blend that contains colours from all the way around the colour wheel will inevitably turn out to be just a little bit brown or grey, if it’s not spun with the intention of maintaining larger areas of each colour, so that the eye still sees each shade in its original hue, when it’s spun and plied into the final yarn.
Helpfully, World of Wool lists the individual colours in the Over the Rainbow blend. When you see them separated out like this, it’s not surprising that my finely drafted singles ended up a dirty green colour. Without the red, I probably would have got a fresh green, but throw in its opposite colour and things begin to turn brown.
Since my first and only experience of “spinning mud,” I’ve been very cautious to only buy blends made from analogous shades - colours that sit relatively close together on the colour wheel, so that if they were all mixed together you wouldn’t get grey or brown, but a heathered, richer shade of the sum of all the colours. I’ve been playing it safe.
Well, my fibre preparation skills have improved quite a bit over the last few years, and so I’ve decided to play around a little and experiment with a few different methods of spinning a multi-coloured blended top.
Since the unfortunate incident with the Over the Rainbow fibre blend, I’ve learned that the two most popular methods deployed to avoid spinning mud are to either spin from the fold, or to tear off strips so that you are spinning from a reduced number of colours. I’ve got a couple of other methods that I’d like to try, but basically, I’m just going to have fun playing around with coloured fibres to see what I come up with.
I’ve had the idea for this post for some time now, and when I was taking a look at the secret “Mill Members” page of John Arbon Textiles I found the perfect fibre blend for this project.
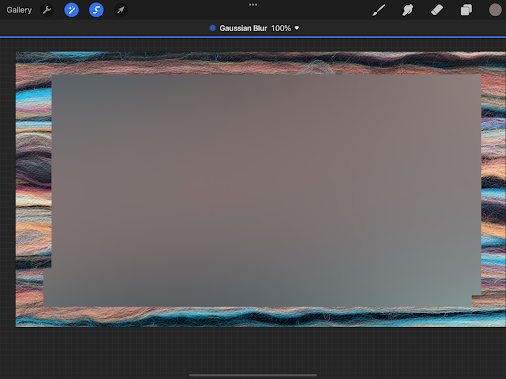
This is “Midsommar” by John Arbon. It seems to be made up of turquoise, black, orange, red, and a tiny dash of yellow and white. Just the fact that it contains quite a bit of both turquoise and orange tells me that there’s a good chance that my yarn will end up brown if I’m not careful.
A quick way to get an idea of what kind of optical blend I would get is to blend the colours digitally beforehand…
The central rectangle selection of the fibre image has been blurred in Procreate
… and yes, it looks like there is a very good chance of ending up with a dull grey/brown.
This could be challenging.
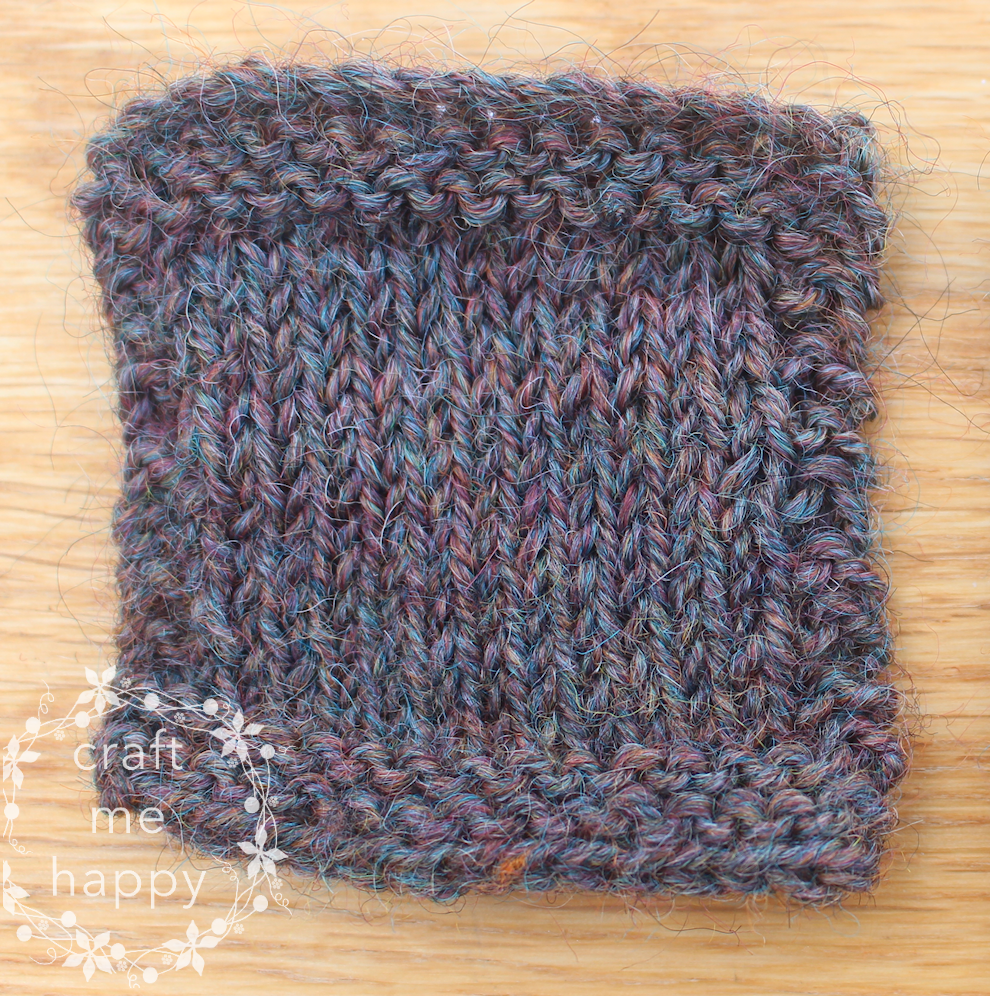
Each single will later be chain-plied with relatively short chains to finish it, as this is the easiest way of increasing the chance of getting the different colours to pool with themselves.
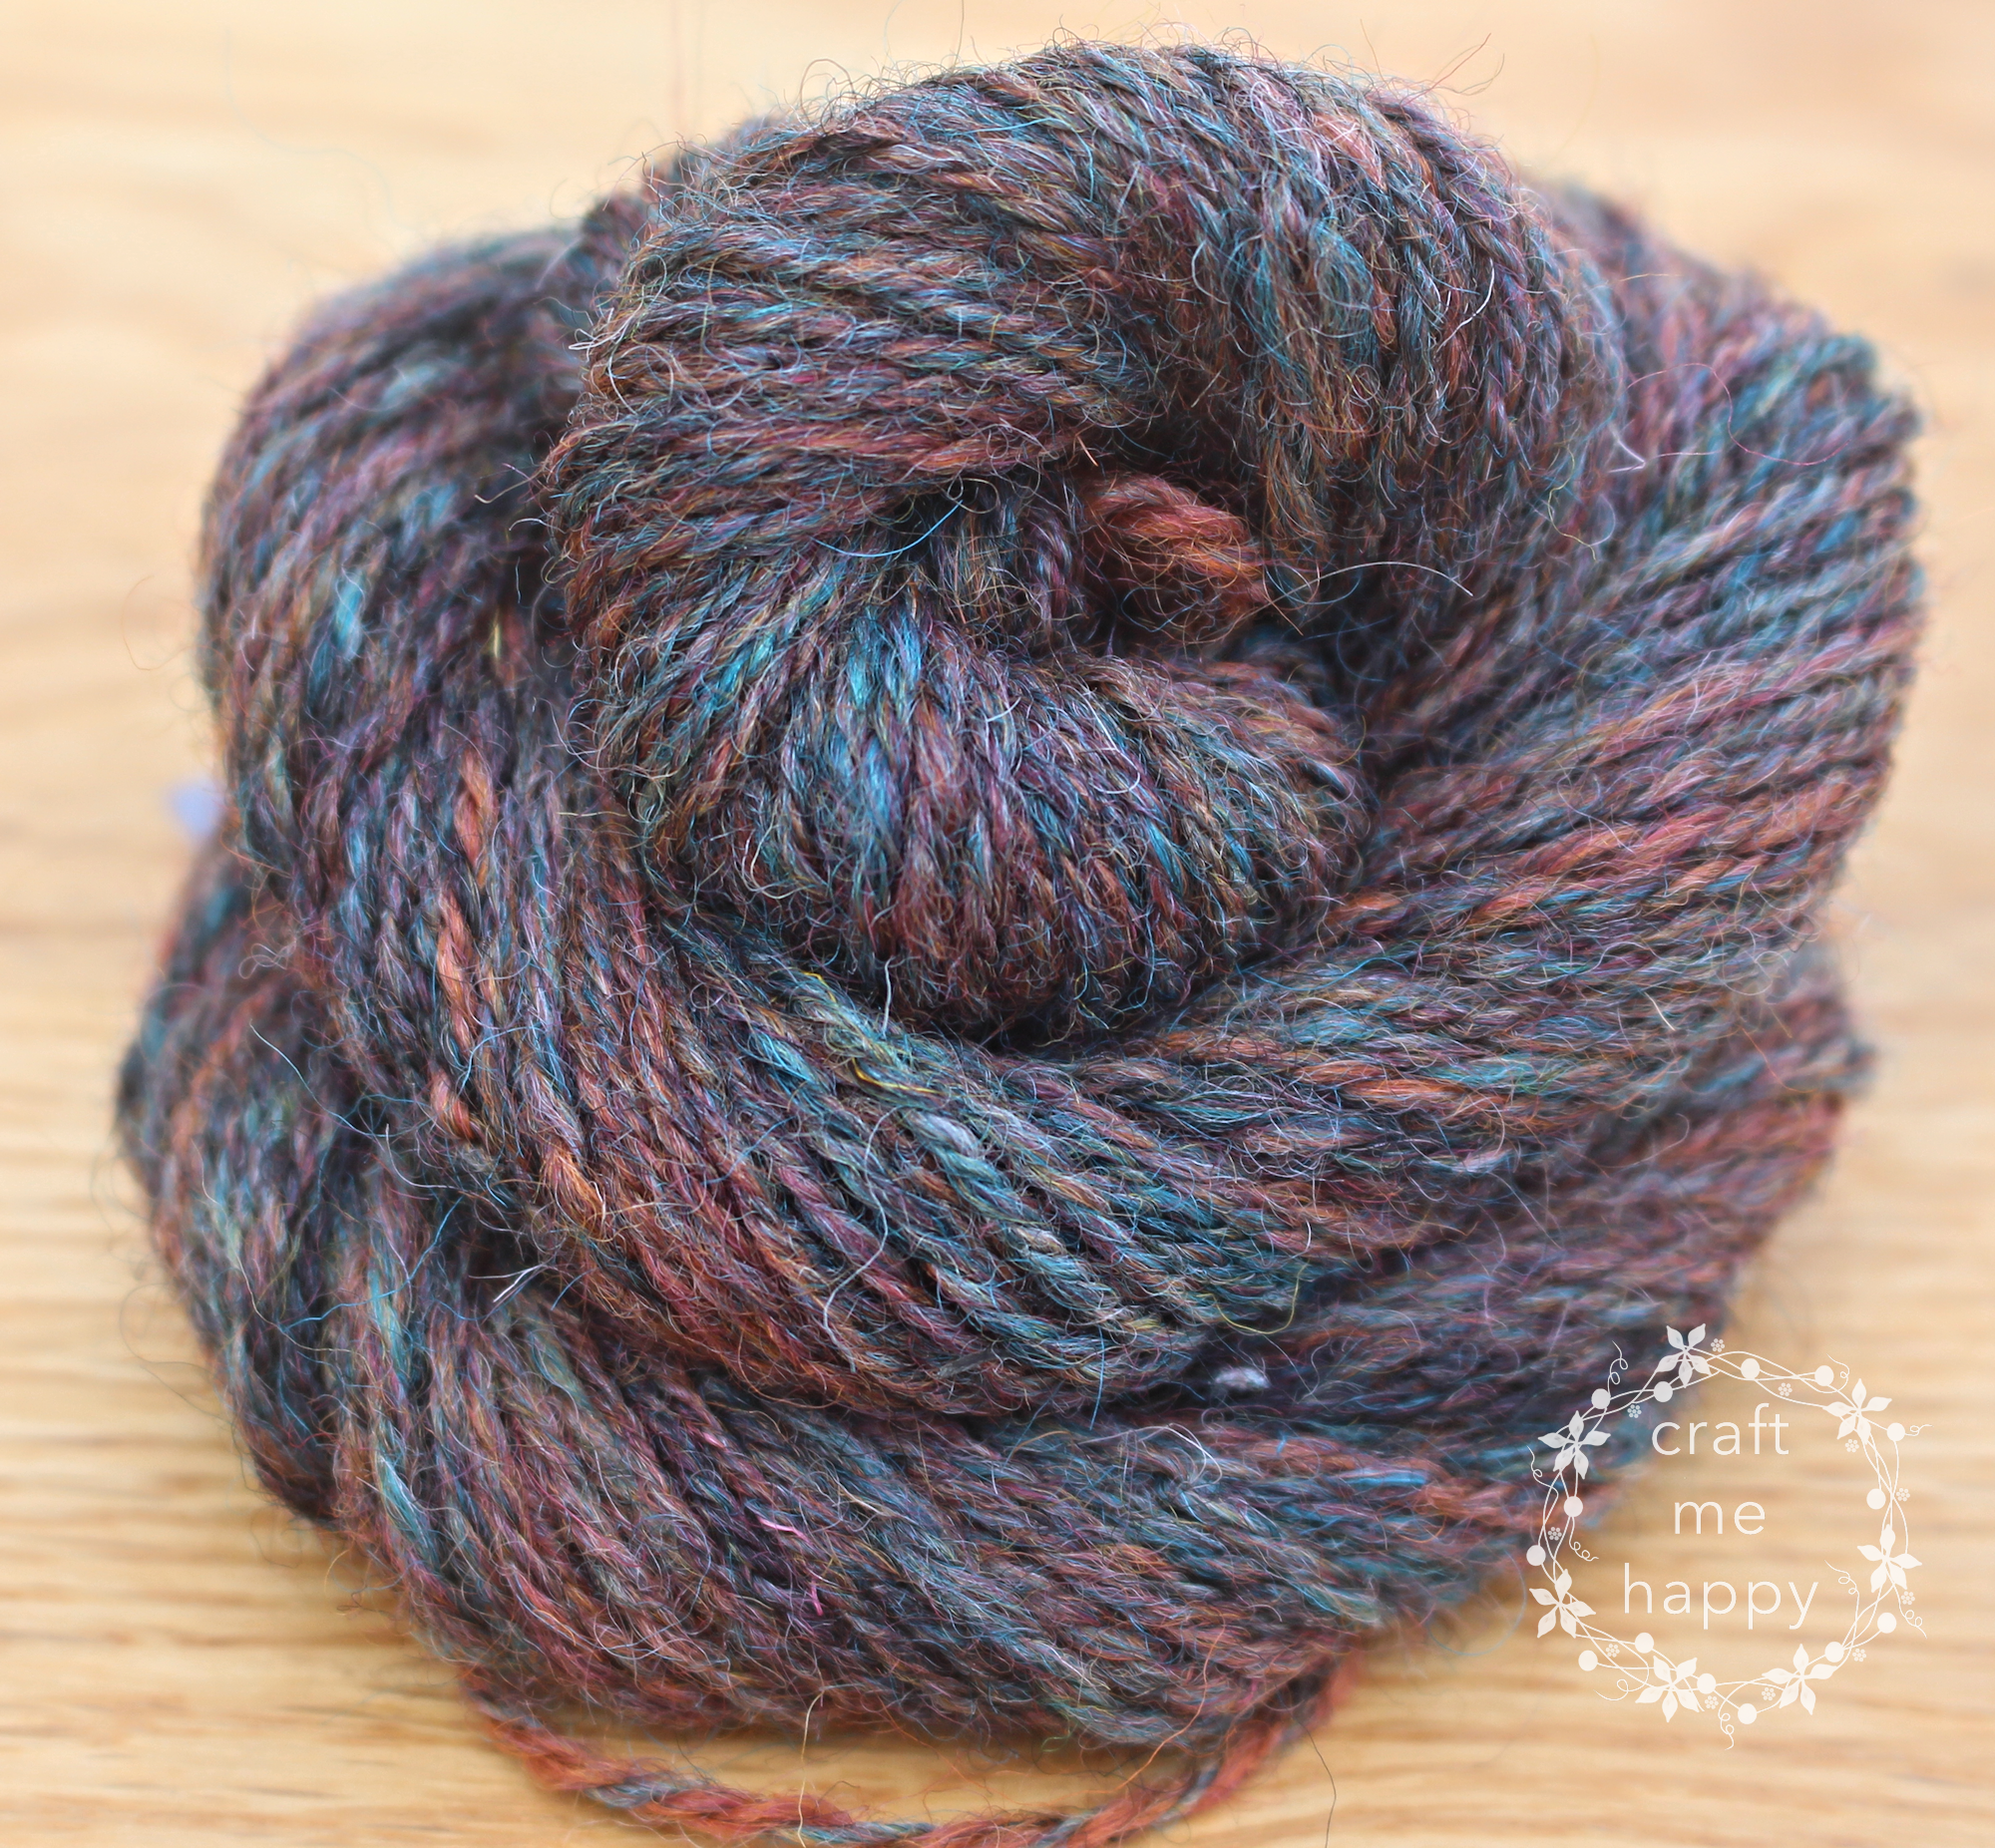
The control - lashing onto a hackle
I’m going to begin by intentionally blending the fibres together by randomly throwing them onto my hackle and then dizzing off a thin roving. This will give me a yarn with quite a thorough blend of colours, and it will be useful to compare my later yarns with. If I were to draft out all of the blended top, and then spin from the end, I imagine that I would get a very similar colour effect.
Here’s the hackle blended yarn. It’s quite an attractive, heathered brown shade, and I love how, when you look closely, you can see the turquoise and orange shades. However, there’s no denying that it’s a long way from the bold, contrasting blended top that I started with.
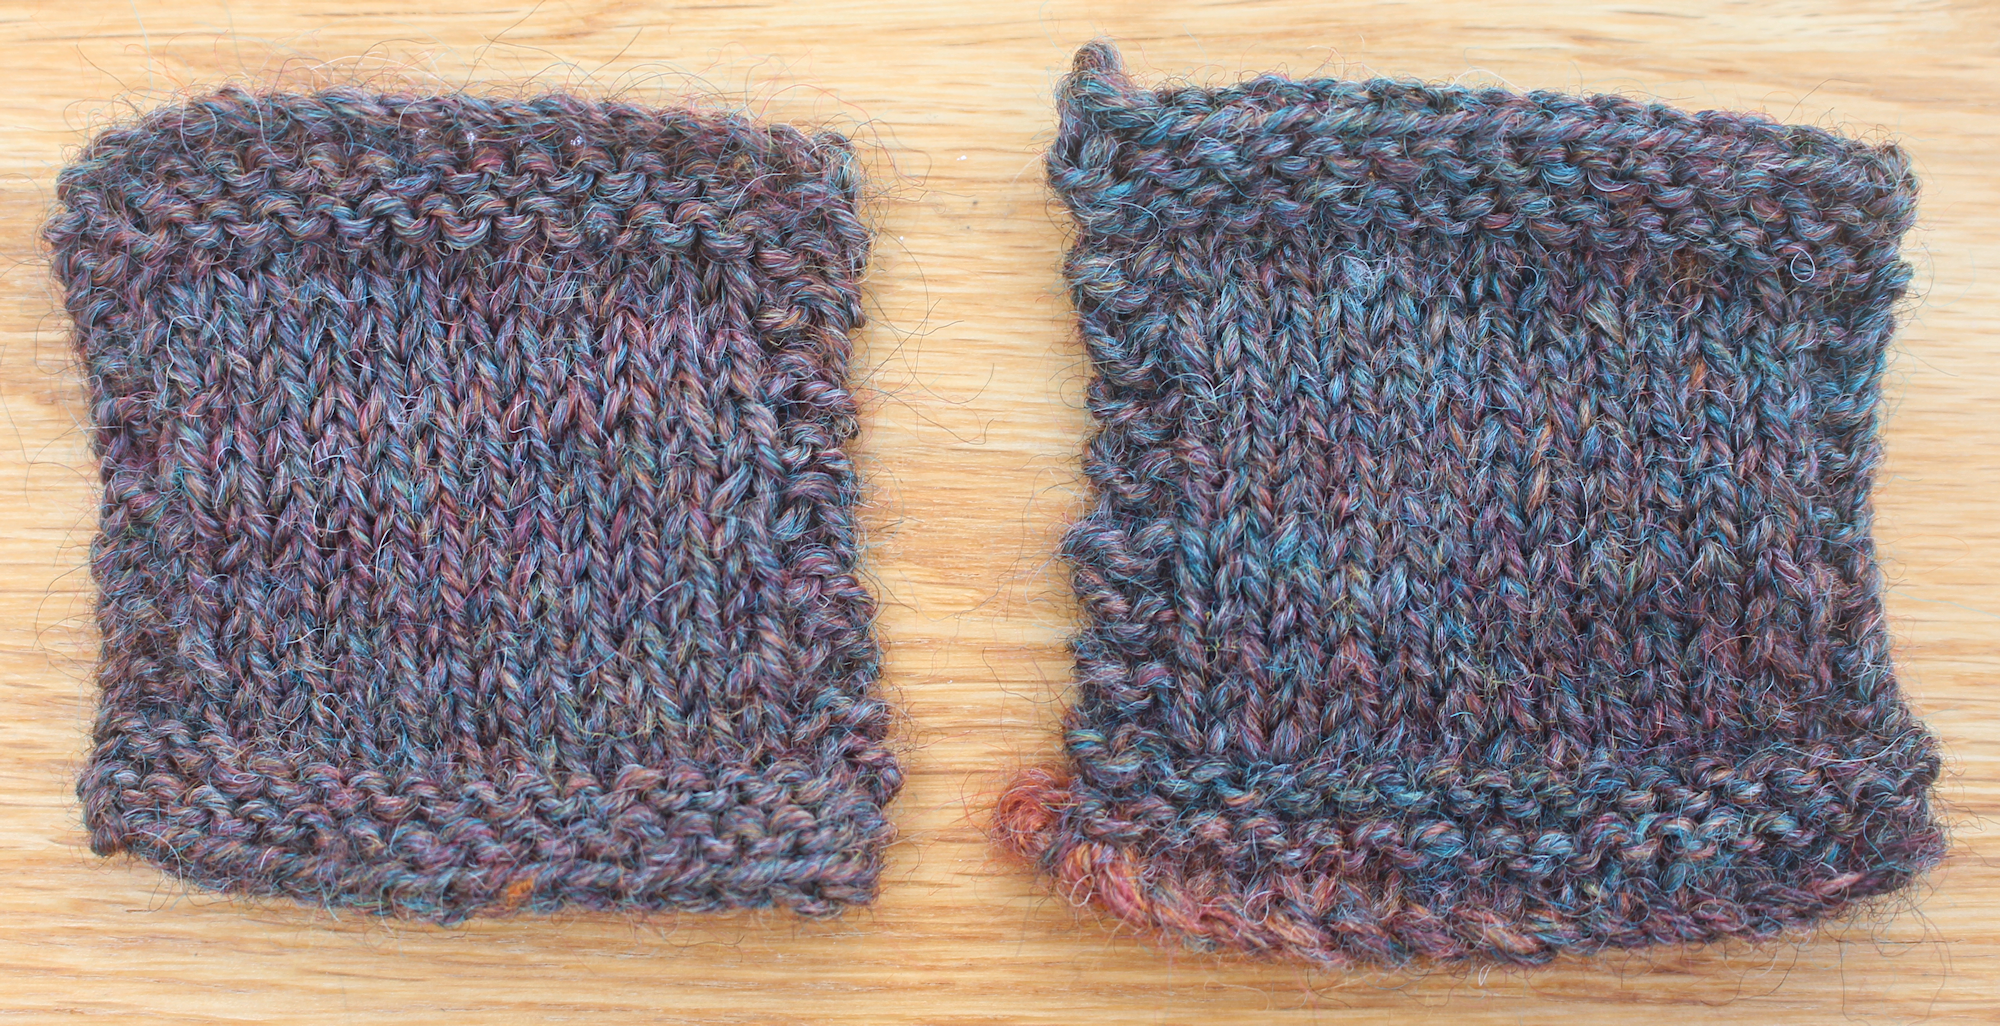
Control yarn knitted sample
#1 Spinning from the end, without pre-drafting
With my first method, I drafted from the very tip of the blended top. Normally, I would predraft my fibres, but that would only thin out each colour, forcing me to spin from all of the colours at the same time. Working from undrafted top allowed me to spin for a while on the individual colours, before moving onto the next colour along.
It took a little more concentration, but I think it was quite effective. I love the tweedy subtlety of this yarn - the orange and turquoise flecks are dotted around the mostly warm brown background.
Control yarn and yarn spun from the end of undrafted top.
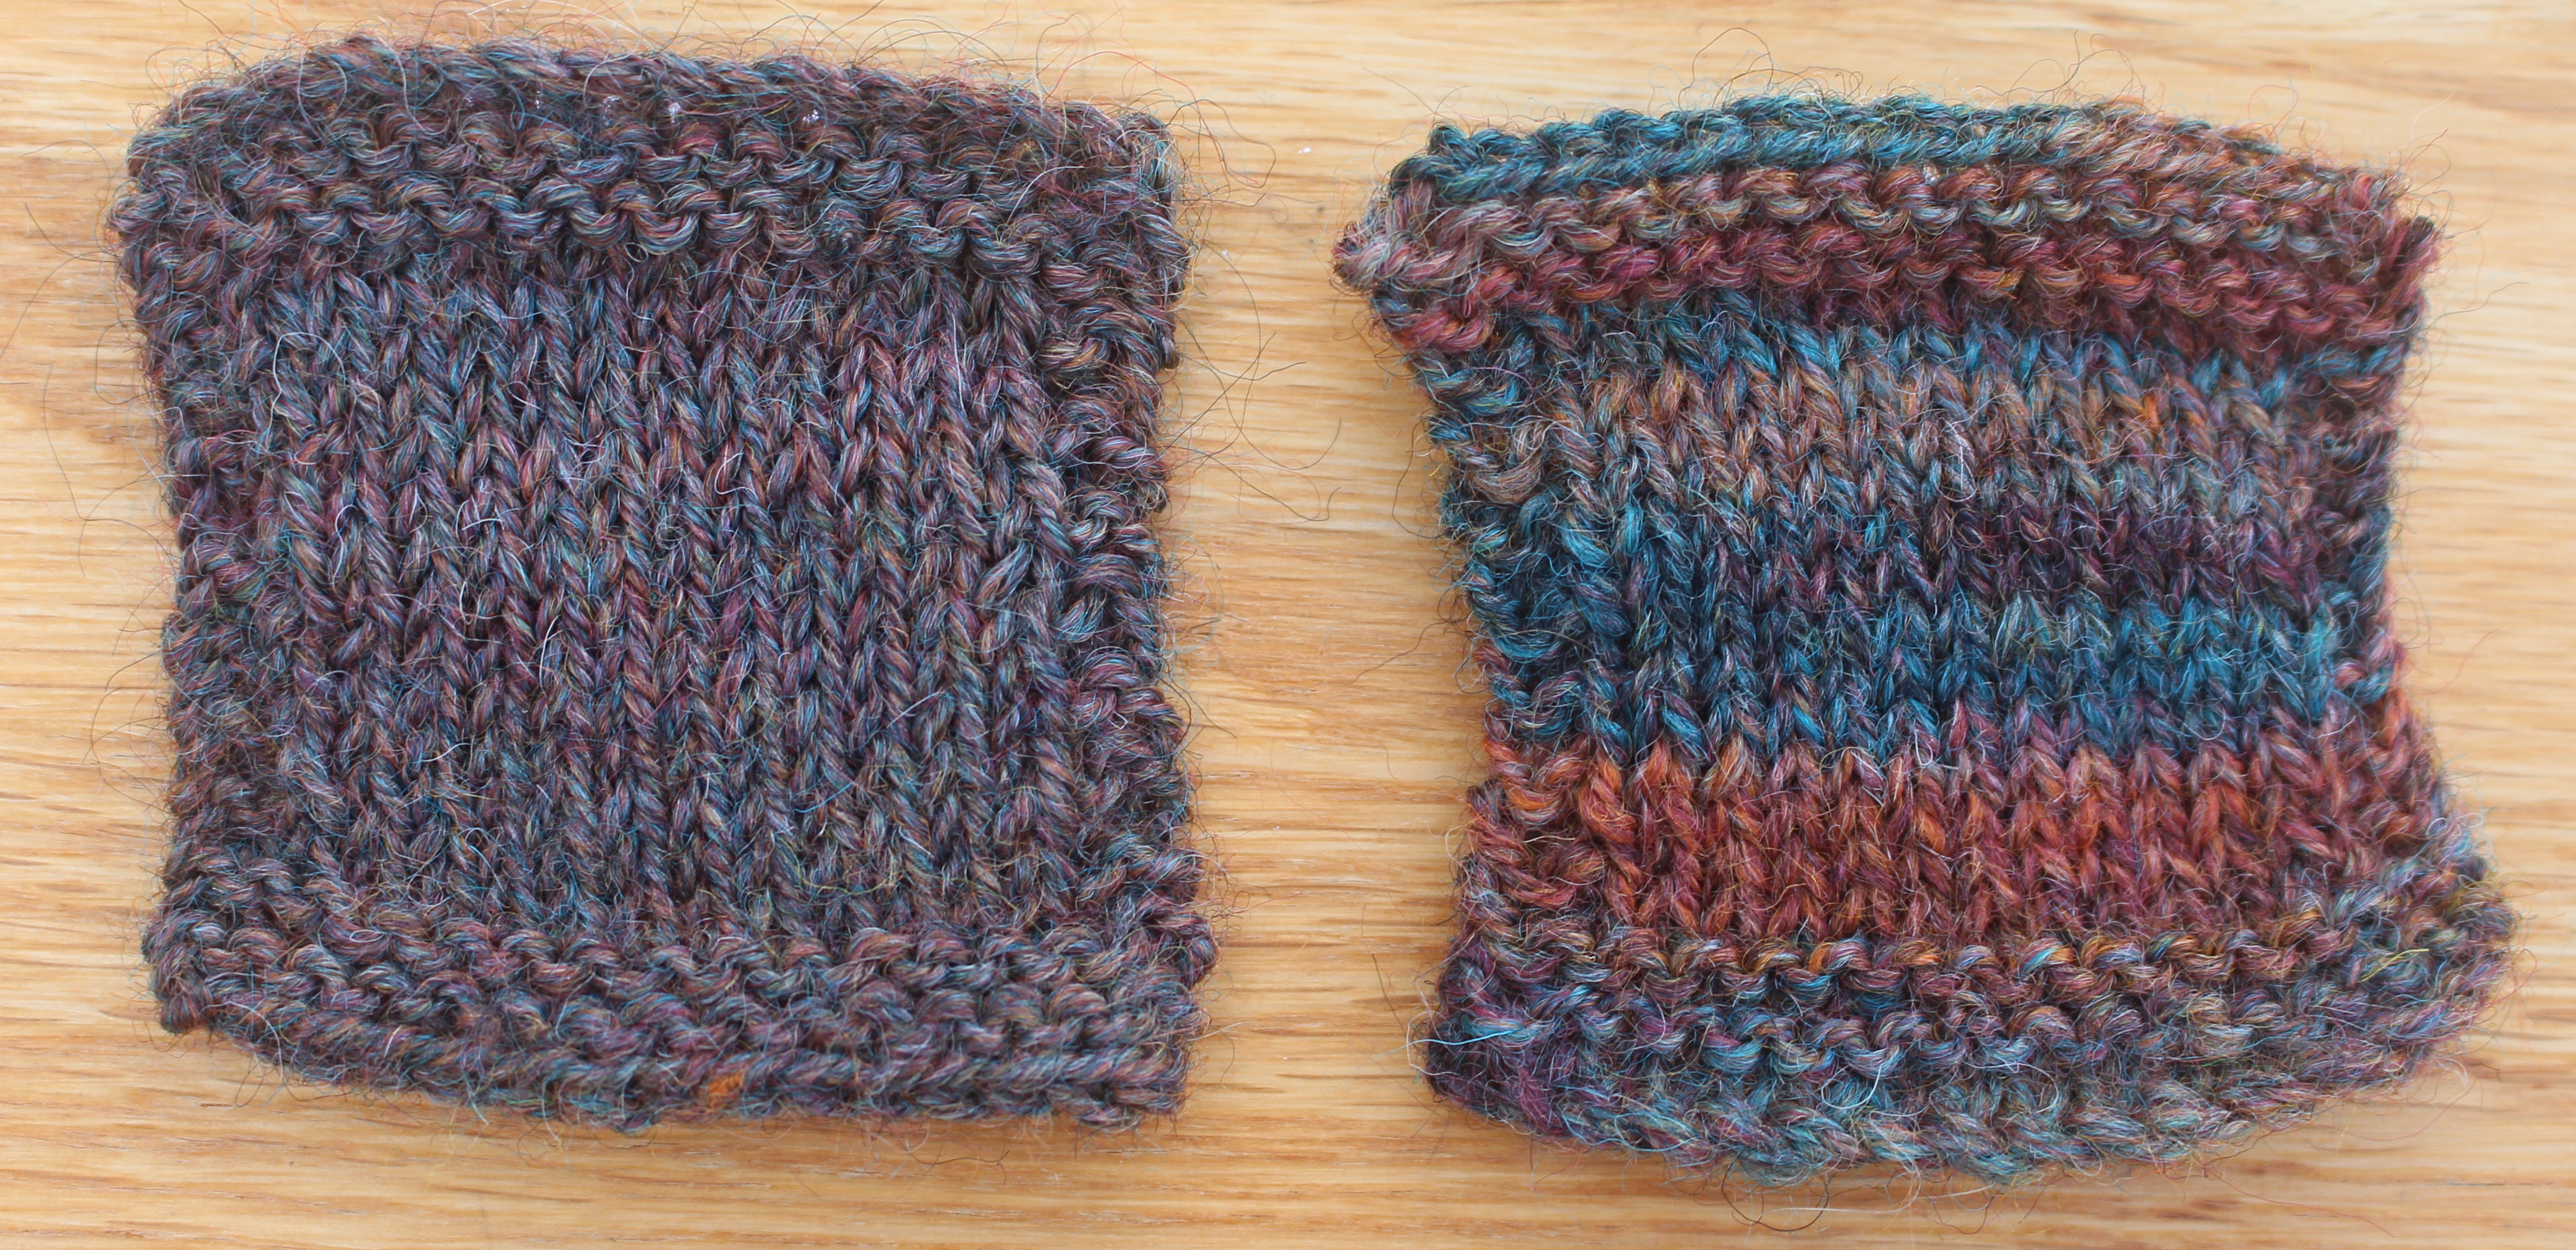
#2 Spinning from the fold
To spin from the fold, I pulled off a small section, that was just 10-15cm long. (I did try longer lengths, but the fibres tended to bunch up in my hand after a little while.) I then opened up the top and spread it across my index finger so that I could see as many of the different bands of colour as possible. I then spun from the centre of the fibres, effectively spinning the blended top from the side, so that the colours were mostly spun one after the other, rather than combined with each other.
The resulting yarn appeared to be the most colourful, with the most barber poling, and the least colour mixing of all of the yarns. As I'd pulled off a shortish length of blended top, it also gave me the shortest individual lengths of colour variegation - which explains why there is so much more barber poling in this yarn than in any of the others.
I can definitely see why this is a popular method for avoiding optical blending, as it was very little extra effort, once I’d worked out my preferred technique.
Control yarn and yarn spun from the fold
Personally, I think this spinning method would look better with a blended top that is made up of analogous shades as the colour changes were much more sudden in the knitted sample, than in any of the others. It is still a very pretty yarn though.
Here's a video of me 'spinning from the fold' in a little more detail.
#3 Splitting the top vertically into a reduced number of colours, and then breaking each section up to distribute it throughout the yarn
The Midsommar top, was really quite well blended, which made splitting it vertically challenging. My goal was to split the blended top into sections that contained just one or two colours, but unfortunately, some of the colour sections were so thin that I was either spinning from sections that barely needed any drafting, or it just wasn’t possible to divide it into sections that wouldn’t turn brown.
It was also a little more effort than the previous 2 spinning methods.
It did give me quite long sections of colour though, compared to some of the other spinning methods.
Control yarn and top split vertically yarn
This yarn felt much more designed than the previous yarns. Although I spun the colours randomly, for speed, I could have arranged them into a gradient, or had longer or shorter colour changes if I had a specific project in mind. This method definitely has a lot of possibilities.
This was one of my favourite yarns, so I made a video of how I made it.
#4 Drafting onto a blending board and then spinning from 3 rolags.
In this method, I drafted the fibre onto the blending board, trying to keep each coloured layer the same.
I then pulled off 3 rolags from the blending board, drafting them off as I rolled.
In retrospect, I think it was quite optimistic of me to hope that carefully putting down 4 layers of fibre on top of each other would ensure that all of the individual colours would stay together during spinning.
As you can see, they mostly merged together, with the odd pop of colour here and there.
Control yarn and 4 layers drafted onto a blending board yarn
The resulting yarn was quite subtle, with the odd fleck of colour on a mostly brown background.
#5 Drafting thickly onto a blending board and then spinning from 1 large rolag
After realising that adding lots of thin layers resulted in a lot more blending of colours, I decided to try something slightly different. This time, I only slightly drafted the fibres onto the blending board in just a couple of layers. I then pulled all of the fibre off in one, large rolag.
Whenever I've seen anyone using a blending board in the past, I've always wondered why they don't pull off just a single rolag, instead of splitting it into two or more. I'd never tried it myself, but as this was definitely a time to play and experiment, I decided to give it a try to see what difference it made.
The resulting rolag looked like it had so much potential and promise, but sadly, it was probably the least fun to spin. The fibres, being wound thickly, took much more effort to draft. It was also impossible to stop the colours from blending as they all seemed to want to be drawn out of the centre of the rolag at once.
If I were to class any of the yarns as a fail, this would be it.
Control yarn and yarn spun from a single, fat rolag
There is a hint of orange in the cast-on edge, and the odd pop of colour here and there, but it's overwhelmingly brown.
It was an interesting learning experiment, but I won't be trying it again.
#6 Opening up the top so that the individual colours lie next to each other in a single layer, and then drafting off four rolags
Well, we learn so much more from our mistakes than our triumphs, and for my third attempt at using the blending board, I worked out a method that really worked for me.
I'd already learned that the more layers I draft onto the blending board, the more likely they are to blend together during spinning, so this time I decided not to draft the fibres on at all. I simply opened up the blended top so that I could see as many of the individual colours as possible, broke it off and then carefully attached it to the blending board with my blending brush.
Having already learned that one thick rolag was definitely not a good idea, I drafted off four separate, thin rolags.
The thin rolags were a little more delicate, but the fibres drafted smoothly from them, the colours blending from one to another easily.
This turned out to be one of my favourite yarns, not just in appearance, but by how easy it was to prepare and spin. It was a joy, and I ended up spinning more of this yarn than any of the others.
Control yarn and yarn spun from a single, undrafted layer
Aesthetically, it's quite similar to the yarn that was spun from the fold, but the colours are just a little bit more muted and the colour changes appear a little less sudden.
#7 Opening up the top so that the individual colours lie next to each other in a single layer on the blending board, and then drafting off with a diz
After my success with a single undrafted layer, I decided to see the difference dizzing the fibre off would make. The fibres were laid down on the blending board in the same way as method 6.
Just in this animated gif, you can see that several colours are being pulled off at once, which is definitely going to result in a lot more optical blending.
This was one of the more subtly coloured yarns that I spun.
Control yarn and yarn dizzed off from a single layer
There's a definite place for this understated yarn, and the pops of colour add interest to what is still quite a reserved yarn.
#8 Opening up the top so that the individual colours lie next to each other in 3 layers on the blending board, and then drafting off with a diz
The only difference between this and the previous yarn is that I laid the fibre on the blending board in 3 layers - attempting to colour match as I laid down the fibre.
The fibre for this yarn was a little easier to diz off as it was laid more thickly on the blending board.
Control yarn and yarn dizzed off from 3 layers
It's still quite similar in appearance to the previous yarn, there are just slightly more areas of colour.
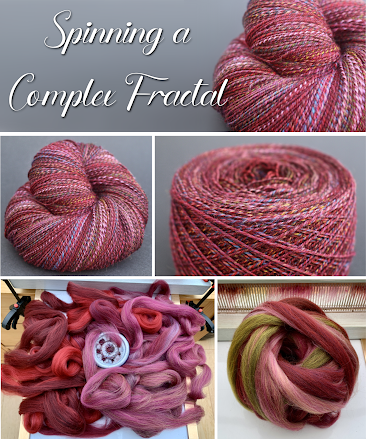
#9 Tearing out each individual colour and arranging it in a gradient on the blending board, then drafting off 4 rolags
This was by far the most time-consuming method of avoiding optical blending, but I think it's one of the most attractive. As the Midsommar blend was really quite well blended, I found myself pulling off very thin strands to arrange them on the blending board in such a way that they wouldn't all merge into brown.
I did actually fill the blending board with a gradient twice - the second time took significantly less time than the first, so I imagine that this is a technique that would get quicker with practice.
Having learned that thinner rolags are better for preventing colour blending, I pulled off four quite delicate, but very attractive rolags to spin from.
Looking at the singles on the wheel, I love how the colours are very distinct and transition beautifully from one to the other.
This resulting yarn looks like it might have been spun from a hand-painted top - but for a fraction of the price!
Control yarn and yarn arranged in a gradient on a blending board
Here, you can see that this yarn, unsurprisingly, has the longest of all the colour repeats. Like the yarn split vertically, this method has a lot of potential variations.
This video shows me separating out the colours in a little more detail -
-----
Gosh, I’ve learned so much, just allowing myself to play with fibre this past couple of weeks. I would highly recommend it! I’ve also fallen back in love with my blending board, now that I’ve learned different ways of using it to avoid spinning mud.
As you can see, I've made four videos of the techniques that I think worked best, and you can find them, and other fibre-to-yarn videos on my YouTube channel here.
If you've found this post useful, please pin it to Pinterest - it makes a big difference and really helps other spinners find it too.
At this point, I normally suggest similar related blog posts, however, my list of spinning-related content is becoming a little unmanageable... If you'd like to read more blog posts about spinning and fibre preparation, please take a look at this page here where you will find links to all of my spinning and fibre articles.
Yes, for this fibre all of the yarns were chain-plied at the wheel with relatively short chains to try to keep the colour sections as short as possible.
Thank you so much for this exceptionally nicely made and HELPFUL post!! I’m a fairly new spinner and have been unsure of how to avoid spinning mud, and this has answered so many of my questions, I can’t tell you how useful it’s going to be for me going forward!! I’ve subscribed to your channel on YouTube and pinned the post on Pinterest. What make is your electric wheel and have you moved to that from a treadle wheel? My husband keeps mentioning electric wheels to me and I’m not convinced I’d enjoy it but would love to hear your thoughts on them.
The e-spinner I’m using here is the Hansencrafts Minispinner but I’ve since acquired the Electric Eel Wheel 6 and a few Electric Eel Wheel Nanos. I’m a Dreaming Robots beta tester so I have to admit to being quite biased towards the Electric Eel Wheels, but if I were to recommend one, it would be the Electric Eel Wheel 6.1. The bobbins are a generous size and it’s unusual for spinners to outgrow the EEW6.1 - unless you want to spin highly textured art yarns or super-fine, high twist yarns. I learned to spin on an Ashford Traditional at university and then bought an Ashford Traveller, however I had to stop treadling for health reasons. Some people love the ‘whole body’, rhythmic experience of treadling while spinning at the wheel and miss the soothing repetitive movement when they transition to an e-spinner. Personally, it took me a little while to get used to the fact that an e-spinner goes at a constant speed, regardless of what your hands are doing but it can also go as slow as you want - which is not always possible on a treadle wheel. For me, the advantages of an e-spinner far outweigh the disadvantages of not treadling. It’s so portable, takes up very little space and you aren’t tied to drafting sitting upright with the wheel right in front of you.


Really informative. Am just about to spin my first multi coloured top. A bit nervous but armed with this info it'll be fun, I hope
ReplyDeleteI really liked those other samples you considered muddy. They were subtle shading with depth and didn't just jump out at the eye.
ReplyDeletesuper informative as ever! Can I just ask, did you spin each ply in the same way, within each method? Thank you!
ReplyDeleteYes, for this fibre all of the yarns were chain-plied at the wheel with relatively short chains to try to keep the colour sections as short as possible.
DeleteThe end result is phenomenal beauty.
ReplyDeleteThank you I really enjoyed watching such an informative project
ReplyDeleteAwesome thank you for sharing I found this very interesting and informative I will have to try it 🌞
ReplyDeleteThank you for elaborating on this! Very interesting!
ReplyDeleteThis. Was. Fantastic! I’m so inspired to try my own version of your experiments!
ReplyDeleteThank you so much for this exceptionally nicely made and HELPFUL post!! I’m a fairly new spinner and have been unsure of how to avoid spinning mud, and this has answered so many of my questions, I can’t tell you how useful it’s going to be for me going forward!! I’ve subscribed to your channel on YouTube and pinned the post on Pinterest. What make is your electric wheel and have you moved to that from a treadle wheel? My husband keeps mentioning electric wheels to me and I’m not convinced I’d enjoy it but would love to hear your thoughts on them.
ReplyDeleteThe e-spinner I’m using here is the Hansencrafts Minispinner but I’ve since acquired the Electric Eel Wheel 6 and a few Electric Eel Wheel Nanos. I’m a Dreaming Robots beta tester so I have to admit to being quite biased towards the Electric Eel Wheels, but if I were to recommend one, it would be the Electric Eel Wheel 6.1. The bobbins are a generous size and it’s unusual for spinners to outgrow the EEW6.1 - unless you want to spin highly textured art yarns or super-fine, high twist yarns.
DeleteI learned to spin on an Ashford Traditional at university and then bought an Ashford Traveller, however I had to stop treadling for health reasons.
Some people love the ‘whole body’, rhythmic experience of treadling while spinning at the wheel and miss the soothing repetitive movement when they transition to an e-spinner. Personally, it took me a little while to get used to the fact that an e-spinner goes at a constant speed, regardless of what your hands are doing but it can also go as slow as you want - which is not always possible on a treadle wheel.
For me, the advantages of an e-spinner far outweigh the disadvantages of not treadling.
It’s so portable, takes up very little space and you aren’t tied to drafting sitting upright with the wheel right in front of you.