


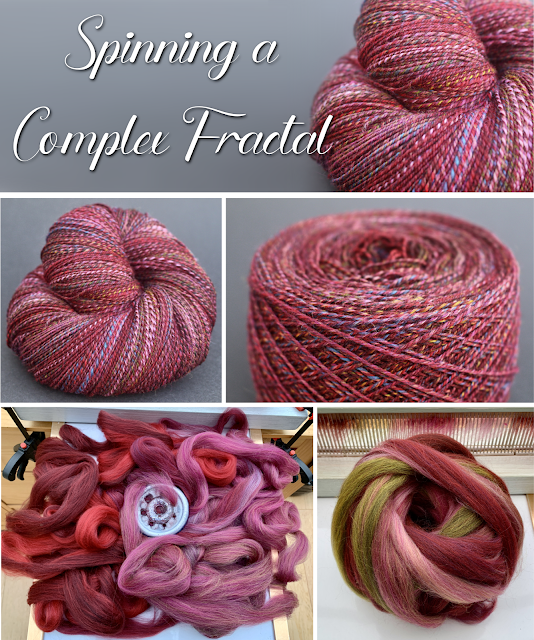
I’ve had the idea for this yarn for a while now, but when I was experimenting with various methods of drafting off a variegated top to spin this complex fractal yarn, it got me thinking about spinning a rainbow yarn using the same technique of filling the hackle in vertical sections.

The primary colour blends I’m using are made from raspberry, jonquil, and Mediterranean from World of Wool. I decided to opt for a 9 colour rainbow as I’ll first be blending the colours with my mini wool combs, and then loading the colours across my hackle. My mini wool combs yield between 5 and 6 grams; this means that I’ll be loading my hackle with between 45 and 54g, which is about as much as my hackle can hold.
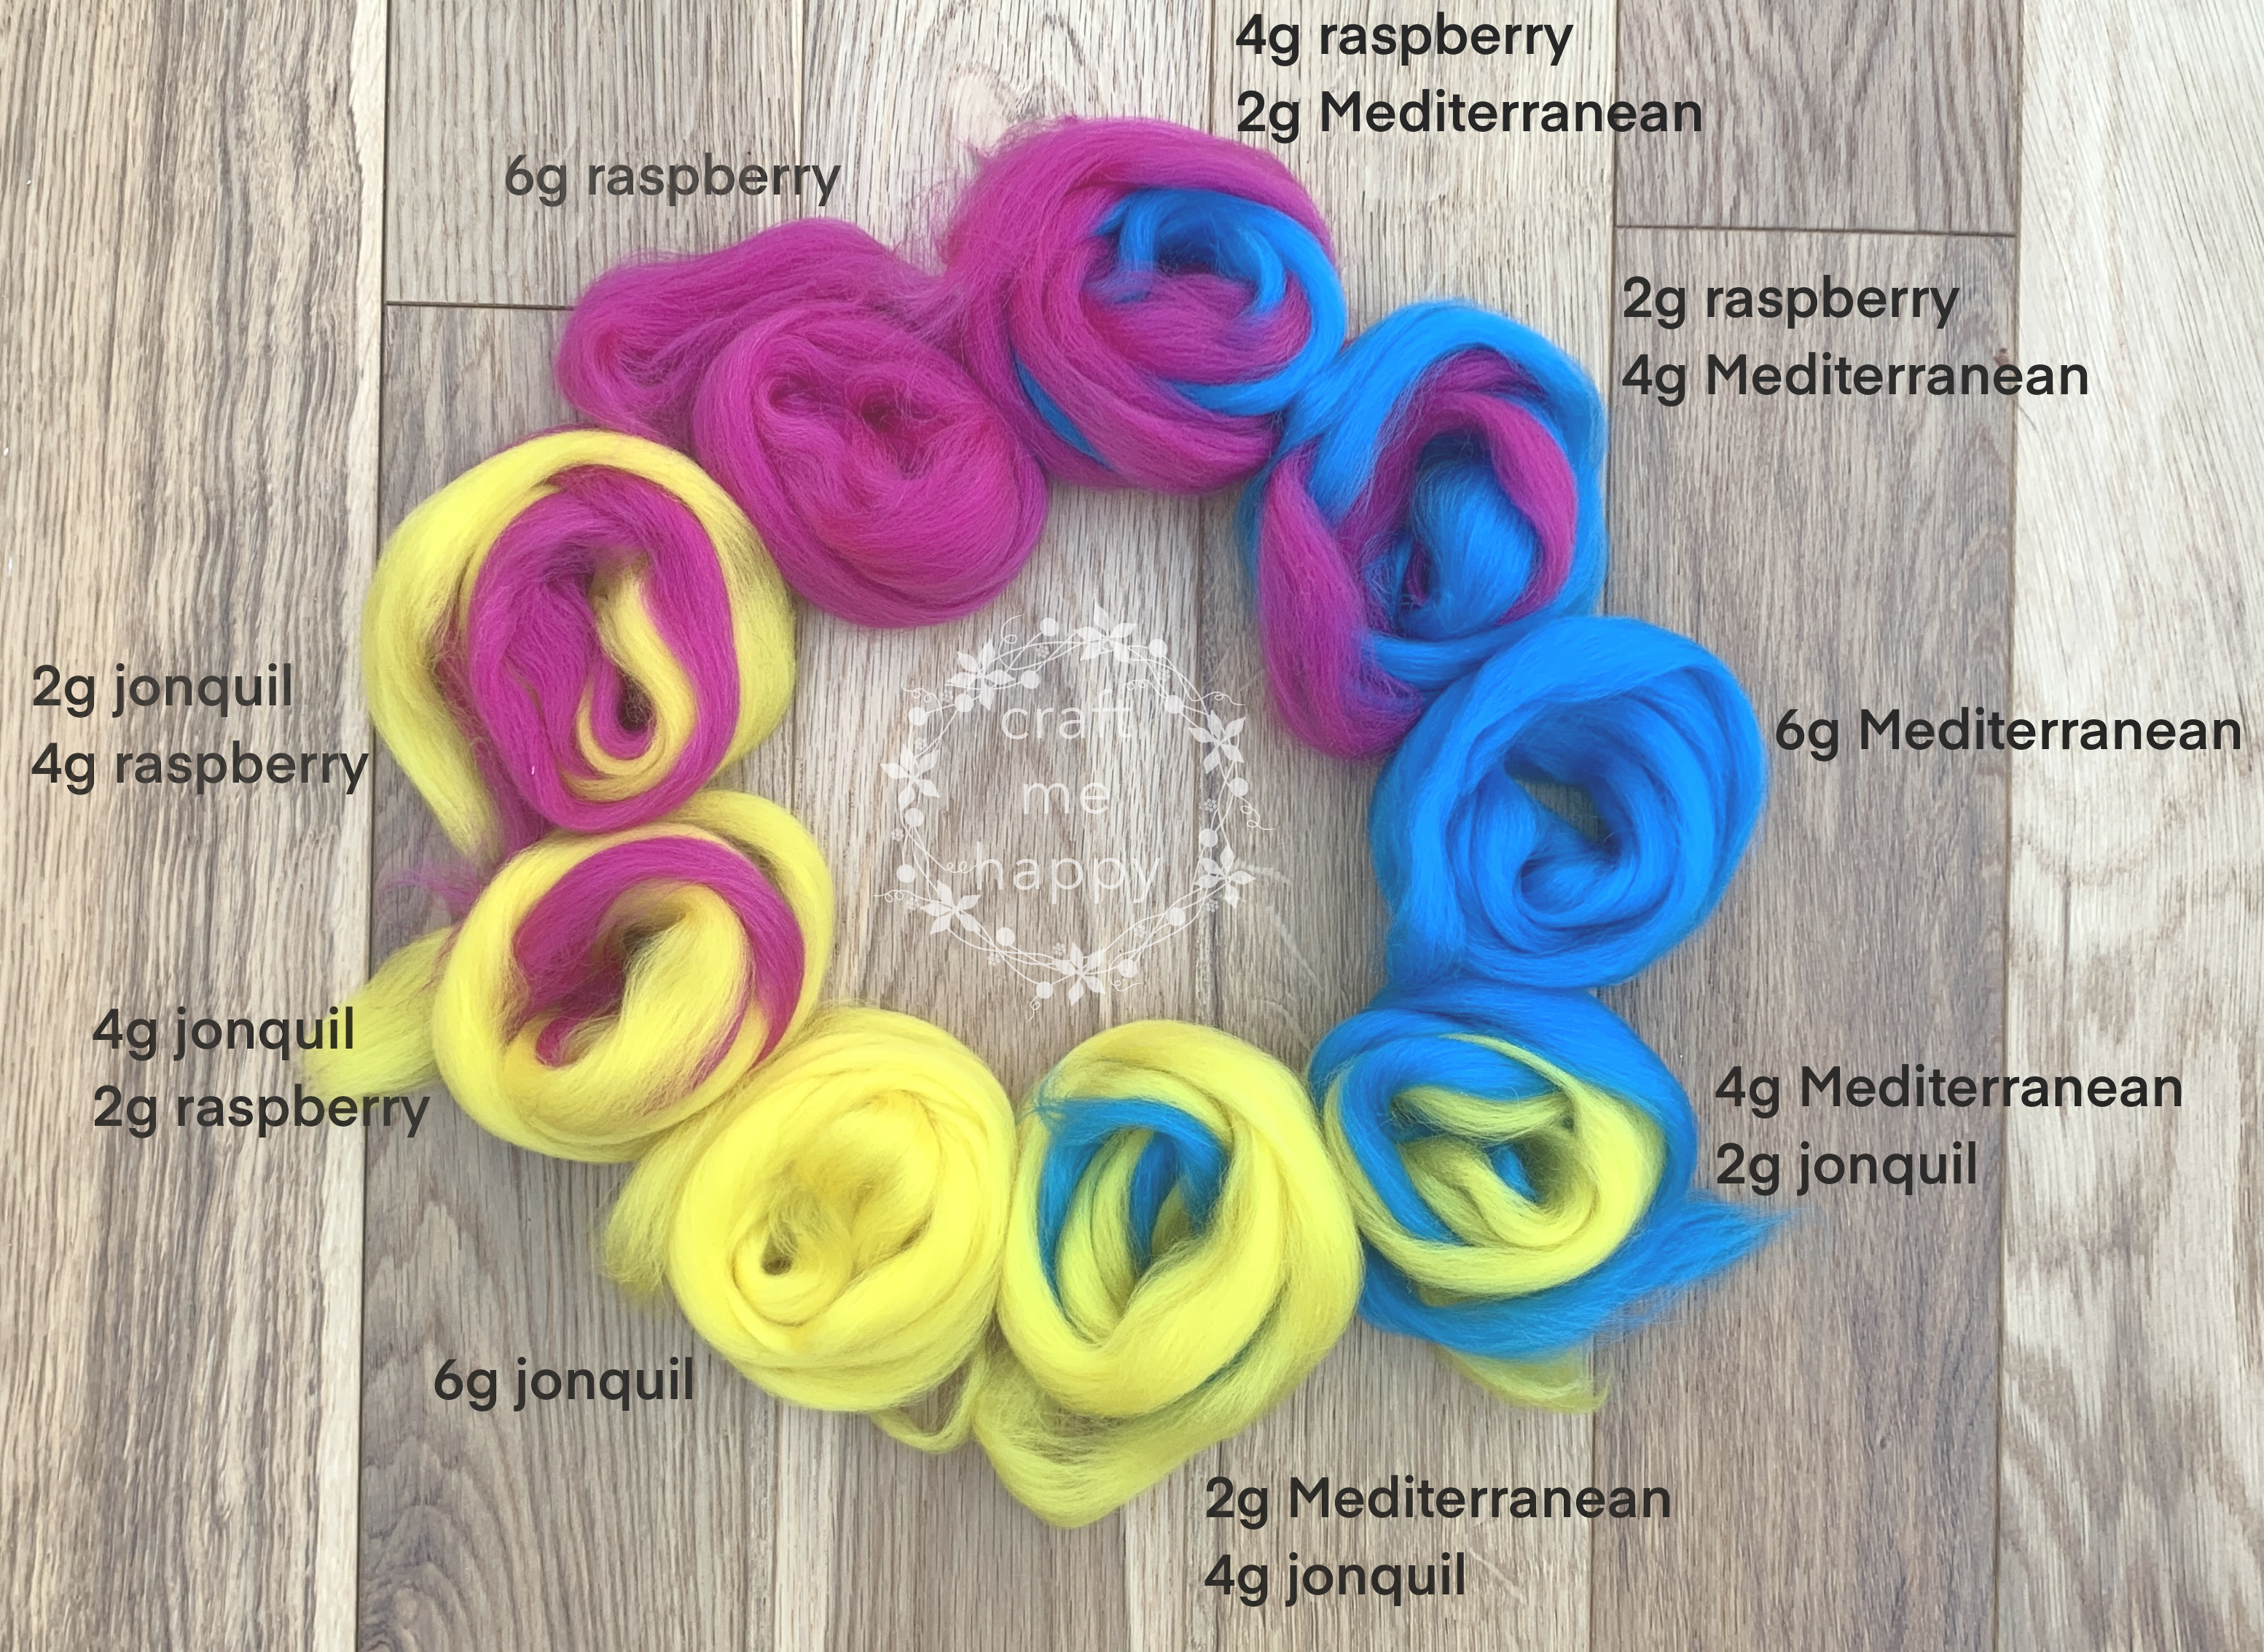
Blending 9 colours also makes the maths significantly easier as I’ll be working with very simple ratios, based on 6g of fibre.

I used the same primaries to spin and make elements for my Joyful wreath, so my final yarn should complement those original motifs. The difference with this yarn is that I'll be starting with just 9 blends instead of 24, and I’m going to be cycling through the colours repeatedly, rather than just spinning the colours one after the other.

The problem with my original rainbow yarn -or any gradient yarns - is that they don’t lend themselves well to a relaxing sweater spin.
If you’ve ever considered knitting a sweater with a gradient yarn, you will quickly come to the realisation that if you want the sleeves to match each other, you either need to start with extra skeins of yarn to work each sleeve, or you need to do an awful lot of cutting, measuring, changing colour and comparing to even get close to knitting two sleeves that have a similar gradient.
I’m hoping this yarn will still have the same joyful rainbow feel, but could be scaled up for a sweater spin, or whatever I decide to make with it.
There's also a video version of this blog post if you'd like to see some of my fibre preparation in more detail.
-----

I began by combing and blending all of the different colour pairings together. I also gave the 3 primary colours a good combing to open up the fibres, and remove any very short fibres.

This is the order that I’ll be loading the colours onto my hackle. I decided to split the rainbow in the middle as I didn’t want the two greens to sit next to each other.
Of the 9 colours, the 2 greens are probably the most similar to each other, so I was concerned that they would dominate my yarn if I positioned them next to each other on my hackle. I’ll be going back and forth, left and right, to draft off the colours so my yarn was always going to have a slightly unorthodox arrangement of rainbow colours.

To create different coloured sections across my hackle, I use a strip of plastic that I insert between the spikes. I like to insert the plastic to the left of where I want my colour to end and I then just keep filling the empty spikes to the right of the plastic strip, trying to keep the fibres an equal height, all the way across. This part of my YouTube video shows my technique for filling the hackle in better detail than I can here.

Here’s one pretty full hackle - you can read how I made my hackle out of onion slicers here.

For fun, I made this animated gif of me drafting the pulled top off my hackle with a diz. I tend to draft off a staple length of fibre from one section before moving along to draft off the next section.


If you’d like to see my technique in better detail please take a look at my YouTube video at this section.

Here are two little Nano bobbins full of rainbow singles. Both of these were blended, drafted, and spun in exactly the same way, but I wanted to chain-ply them using two different methods to see which yarn I preferred.

The yarn on the left was chain-plied at the wheel. For a close-up video of my chain-plying technique, take a look at this video. For the yarn on the right, I made a chain-plied ball, before running the singles through the wheel to add plying twist.

I'll write a little more about the merits of both chain-plying methods in a future blog post. but for now, I'm just trying to decide which of these yarns will be part of the final elements for my Joyful Wreath.

So here they are - I love them both!

I love the bold, clean, fresh look of all those glorious, solid, rainbow colours. The shorter chains really helped to keep all of the colours separated.

The yarn made from a chain-plied ball is much more complex and interesting to look at. While it was on the bobbin, I wasn't sure about some of the contrasting barber poling, but now that I can see the skein as a whole, it all starts to make sense. I can’t stop looking at it!
Thank you so much for visiting my blog. If you’ve found this post interesting or useful, please pin it to Pinterest. It really does make a big difference to me and helps other spinners find it too.
At this point, I normally suggest similar related blog posts, however, my list of spinning-related content is becoming a little unmanageable... If you'd like to read more blog posts about spinning and fibre preparation, please take a look at this page here where you will find links to all of my spinning and fibre articles.
Thank you for reading, and happy spinning!


----------
Please be sweet and share the love. Leave a comment, subscribe to my YouTube channel, like my Facebook page for regular updates or follow me on Pinterest, Bloglovin' or Instagram
No comments:
Post a Comment