


In March this year, I began making decorations to embellish my Joyful Wreath. My goal was to try to post one repeating wreath decoration a month, with a final reveal in December. Some of the wreath motifs will be new to my blog, while others will be an updated version of one of my more popular craft tutorials. Hopefully, by the end of 2022, I will have made a totally joyful and fabulous wreath to hang on my craft room door, to brighten everyone’s morning.

For October I'm sharing how to make these singed flowers.
Back in 2015, I shared how to make this singed rose -

It's still one of my most popular blog posts and I've wanted to revisit singed flowers for a long time. Back then, I wasn't able to show my technique for the actual singeing process, but I've now got the means to film and photograph my hands, so that should hopefully make things a little clearer.
There’s a short video here that demonstrates my technique for making layered, singed flowers.

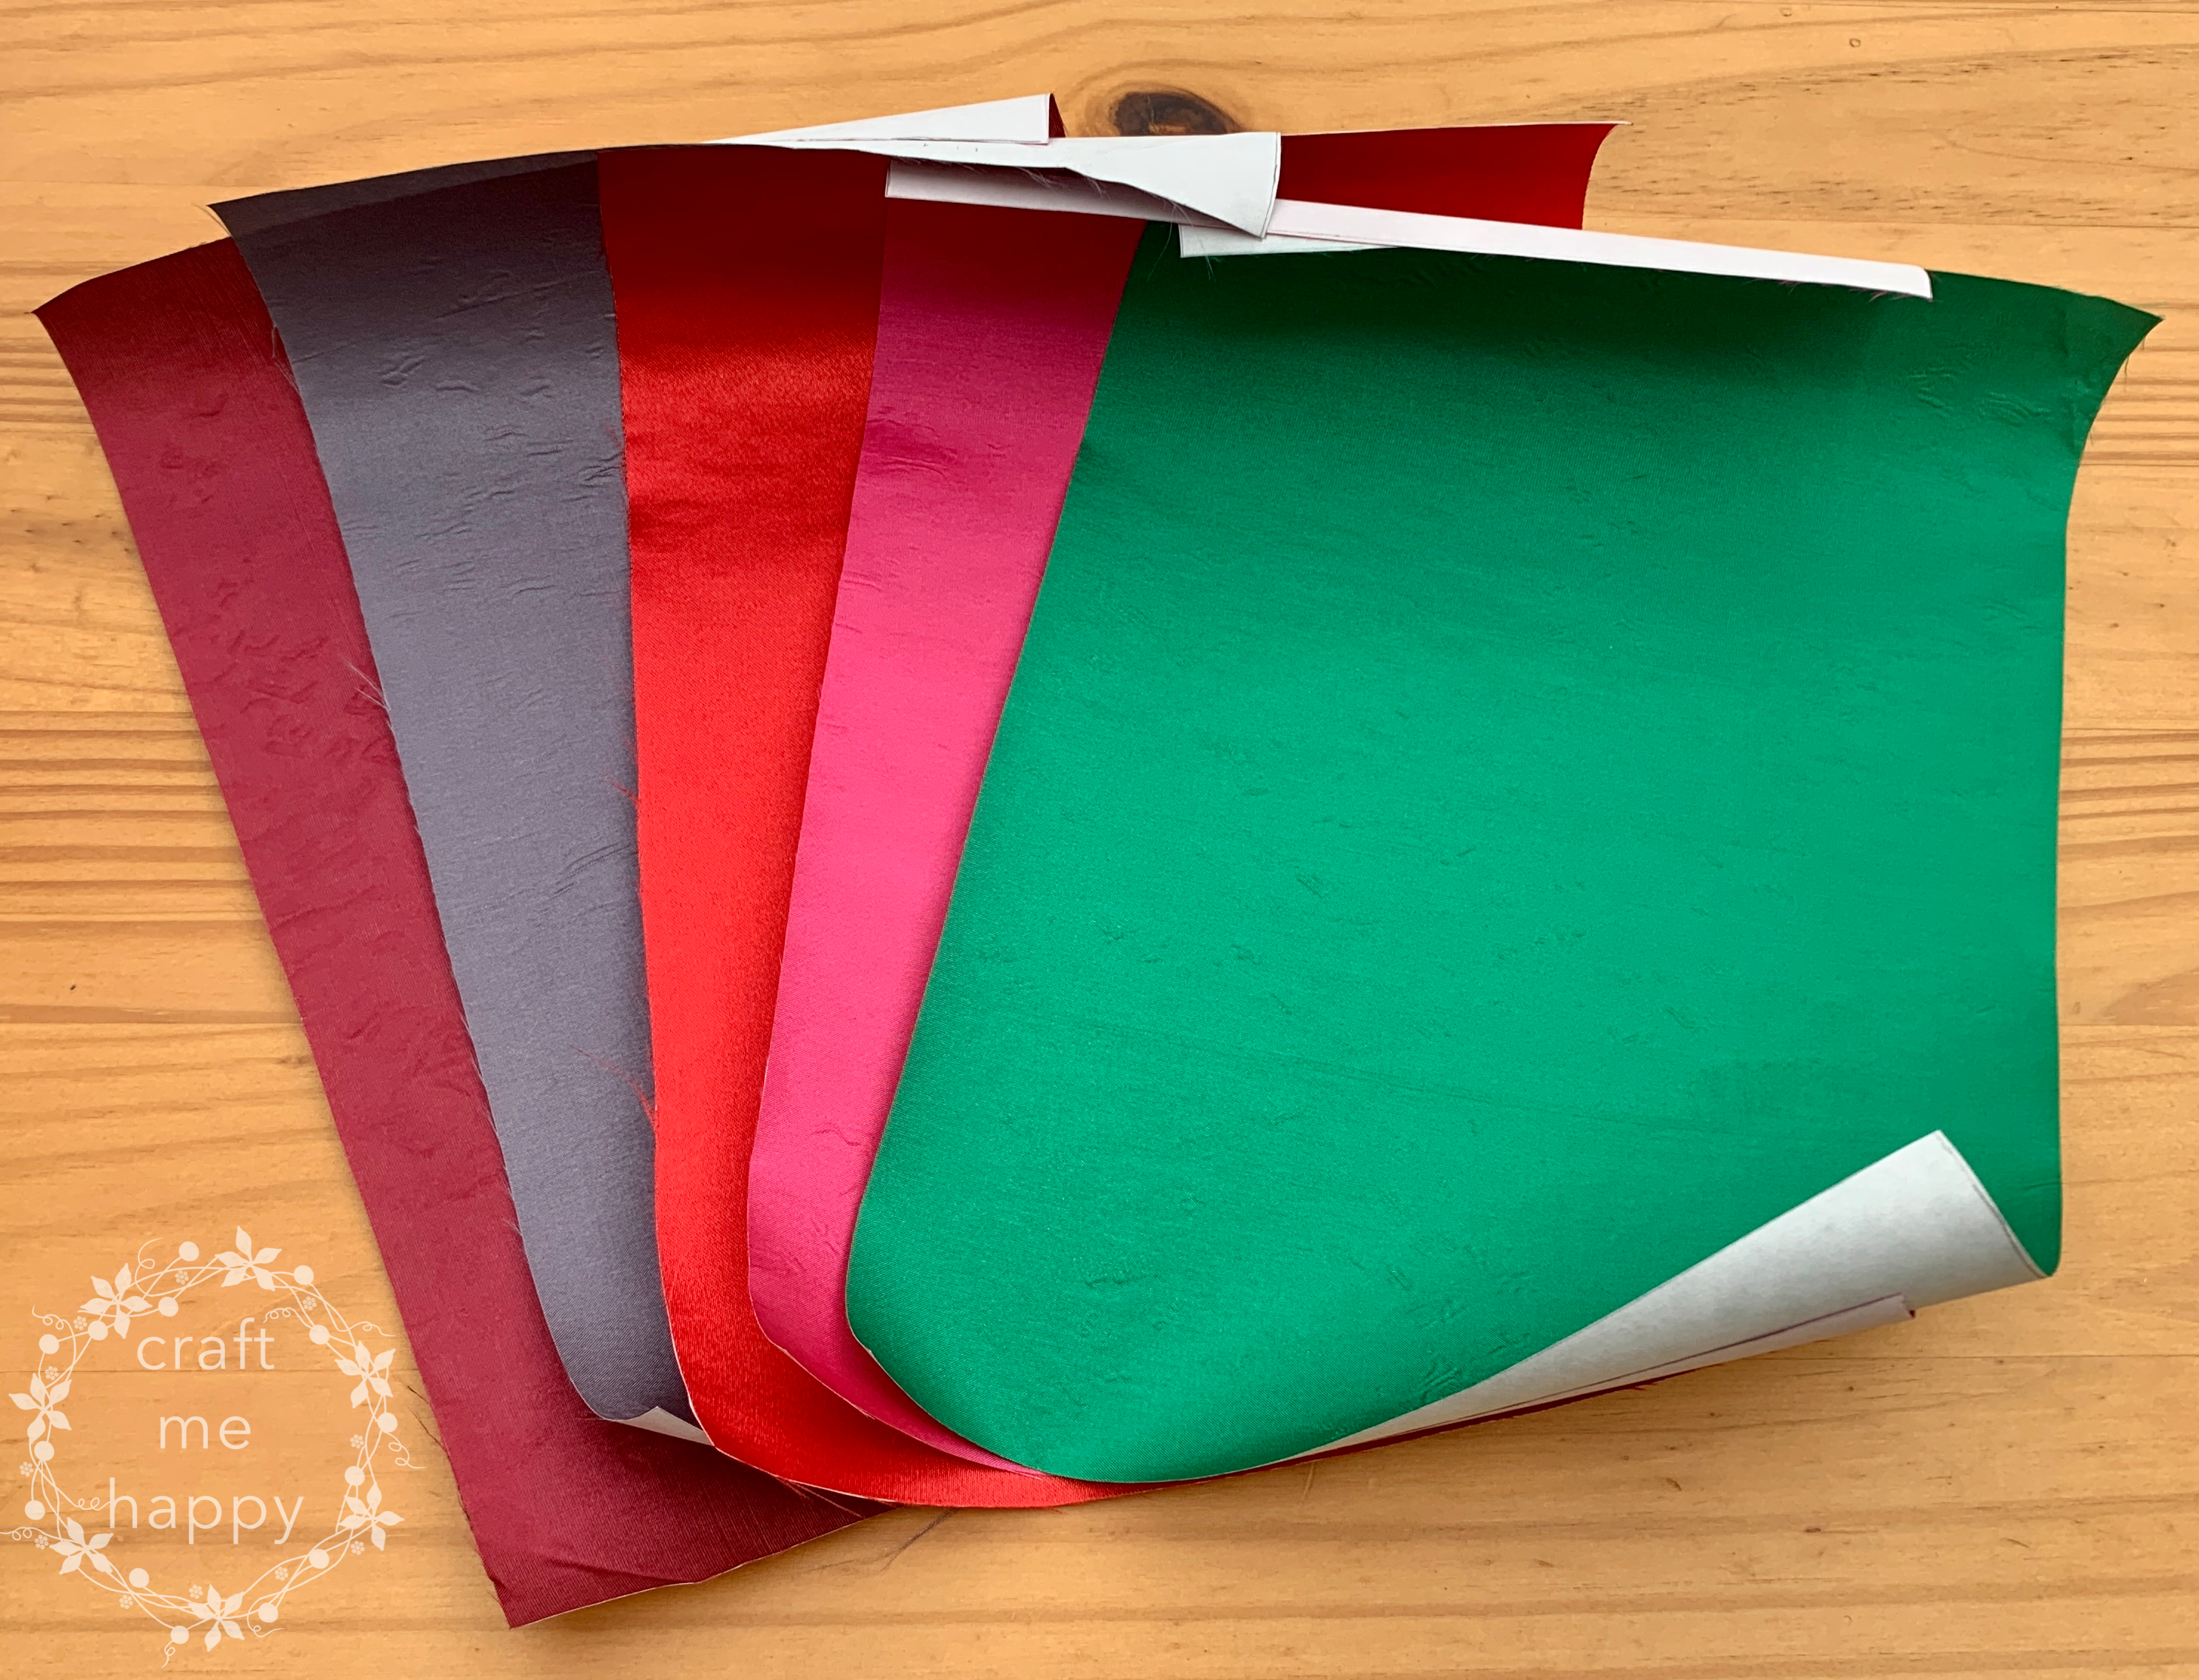
Materials needed to make layered singed flowers
If you've never made singed flowers before, it's really very inexpensive to get started, you just need to be a little careful with your choice of fabric. You are literally playing with fire so you need to make sure that your fabric is going to shrink and melt slightly on the edges when the flame comes near it, and not go up in flames. Please be extra cautious and test your fabric by burning it over a sink full of water. 100% polyester fabrics are usually best suited to making singed flowers. Different fabrics react in different ways; cotton and silk will burst into flames, some synthetics will curl up and go a shade darker at the edges, while others will stay flat or leave scorch marks, so it's always a good idea to buy a few small samples before you commit.
This blog post contains Amazon Affiliate links to products, similar to the ones I purchased myself to make the singed flowers. If you click through and make a purchase, I'll receive a small percentage of the purchase price at no additional cost to you.
To make my layered singed flowers I used :-
- Reynolds Freezer Paper
- 1 A4 piece of paper
- Thin polyester lining fabric. I'm using some habutai polyester that I purchased from my local Boyes store.
- Pencil
- Tea light and lighter
- Printer
- You can print out the flower shapes here
- Scissors
- Iron and Ironing Board

First, cut the Reynolds Freezer Paper into rectangles that are about 2cm larger than a piece of A4 paper. It doesn't have to be precise as you'll be cutting them down later on.
As a guide, there are two flowers for each A4 piece of freezer paper and you will need one sheet for every colour you plan to make.

Iron your fabric to remove any creases and then lay a rectangle of freezer paper on top, with the shiny side down.
Iron the freezer paper onto the fabric, working from the centre outwards, paying extra attention to the edges.
The plastic coating on the freezer paper will melt slightly and temporarily bond itself to the fabric.

Lay the A4 piece of paper on top of the freezer paper and draw around it.

Cut out the A4 piece of fabric and freezer paper and iron it again. Cutting a few millimetres off the edge ensures that you won't be inserting a frayed edge into the printer. The fabric and paper combination will want to curl up, so, while it's hot, place it under a large book, or something flat and heavy until it has cooled down.
Here are my sheets of fabric and freezer paper ready to cut out. As you can see, they still have a tendency to curl, so I'll need to load them into my printer one at a time, and babysit them a little, while they are printing.

Here's my printable for a layered flower. You should be able to download a printable PDF to fit on an A4 piece of paper here.

Place the fabric and freezer paper sections in the printer so that they will print onto the paper side. I had to take extra care to push my paper in to make sure that my printer was accepting the edge and it hadn't become folded over.
As you can see, it folded slightly, but this didn't affect my final printout.
(Of course, if you are at all wary of inserting the fabric and freezer paper into your printer, you could print them onto thin card and draw around them. The freezer paper will still make the flowers a lot easier to cut out.)


Peel the fabric flower away from the freezer paper. Some of the fabric may fray and stick to the backing. Don’t worry, as singeing the edges will remove the stray threads and prevent any more fraying.
Attaching the flowers to the freezer paper, and then printing the shapes on saves so much time, as well as making all of those delicate fabric flowers a lot less fiddly to cut out!

Here’s my little collection of fabric flowers ready to be singed. This little pile will make 10 flowers.

Each flower is made up of 2 large, 2 medium, and 2 small flowers.

To singe the flower edges, I don’t touch the flame with the fabric, I just put it close enough for the heat from the flame to cause the fabric to melt and curl away from the flame.

If you hold the end few millimetres of the flower above the flame, it should curl upwards and away from the flame, which adds an organic realism to the petals.
The flower shapes are a little trickier to singe than the rose petals I did previously, but, after a while, I worked out the most efficient method that worked for me. On the first pass, I went around the outer petal edges, curling them and sealing the frayed edges.

Once I’d singed and shrunk the outer edges of the petals it was time to singe the valleys between the petals. Holding two petals apart, I moved the V shape towards the flame, stopping as soon as the frayed edges had melted. I only wanted to singe it to the point that the edges were sealed, with no stray threads showing.

Arrange all of the flower layers in descending size order, ready to be sewn together.
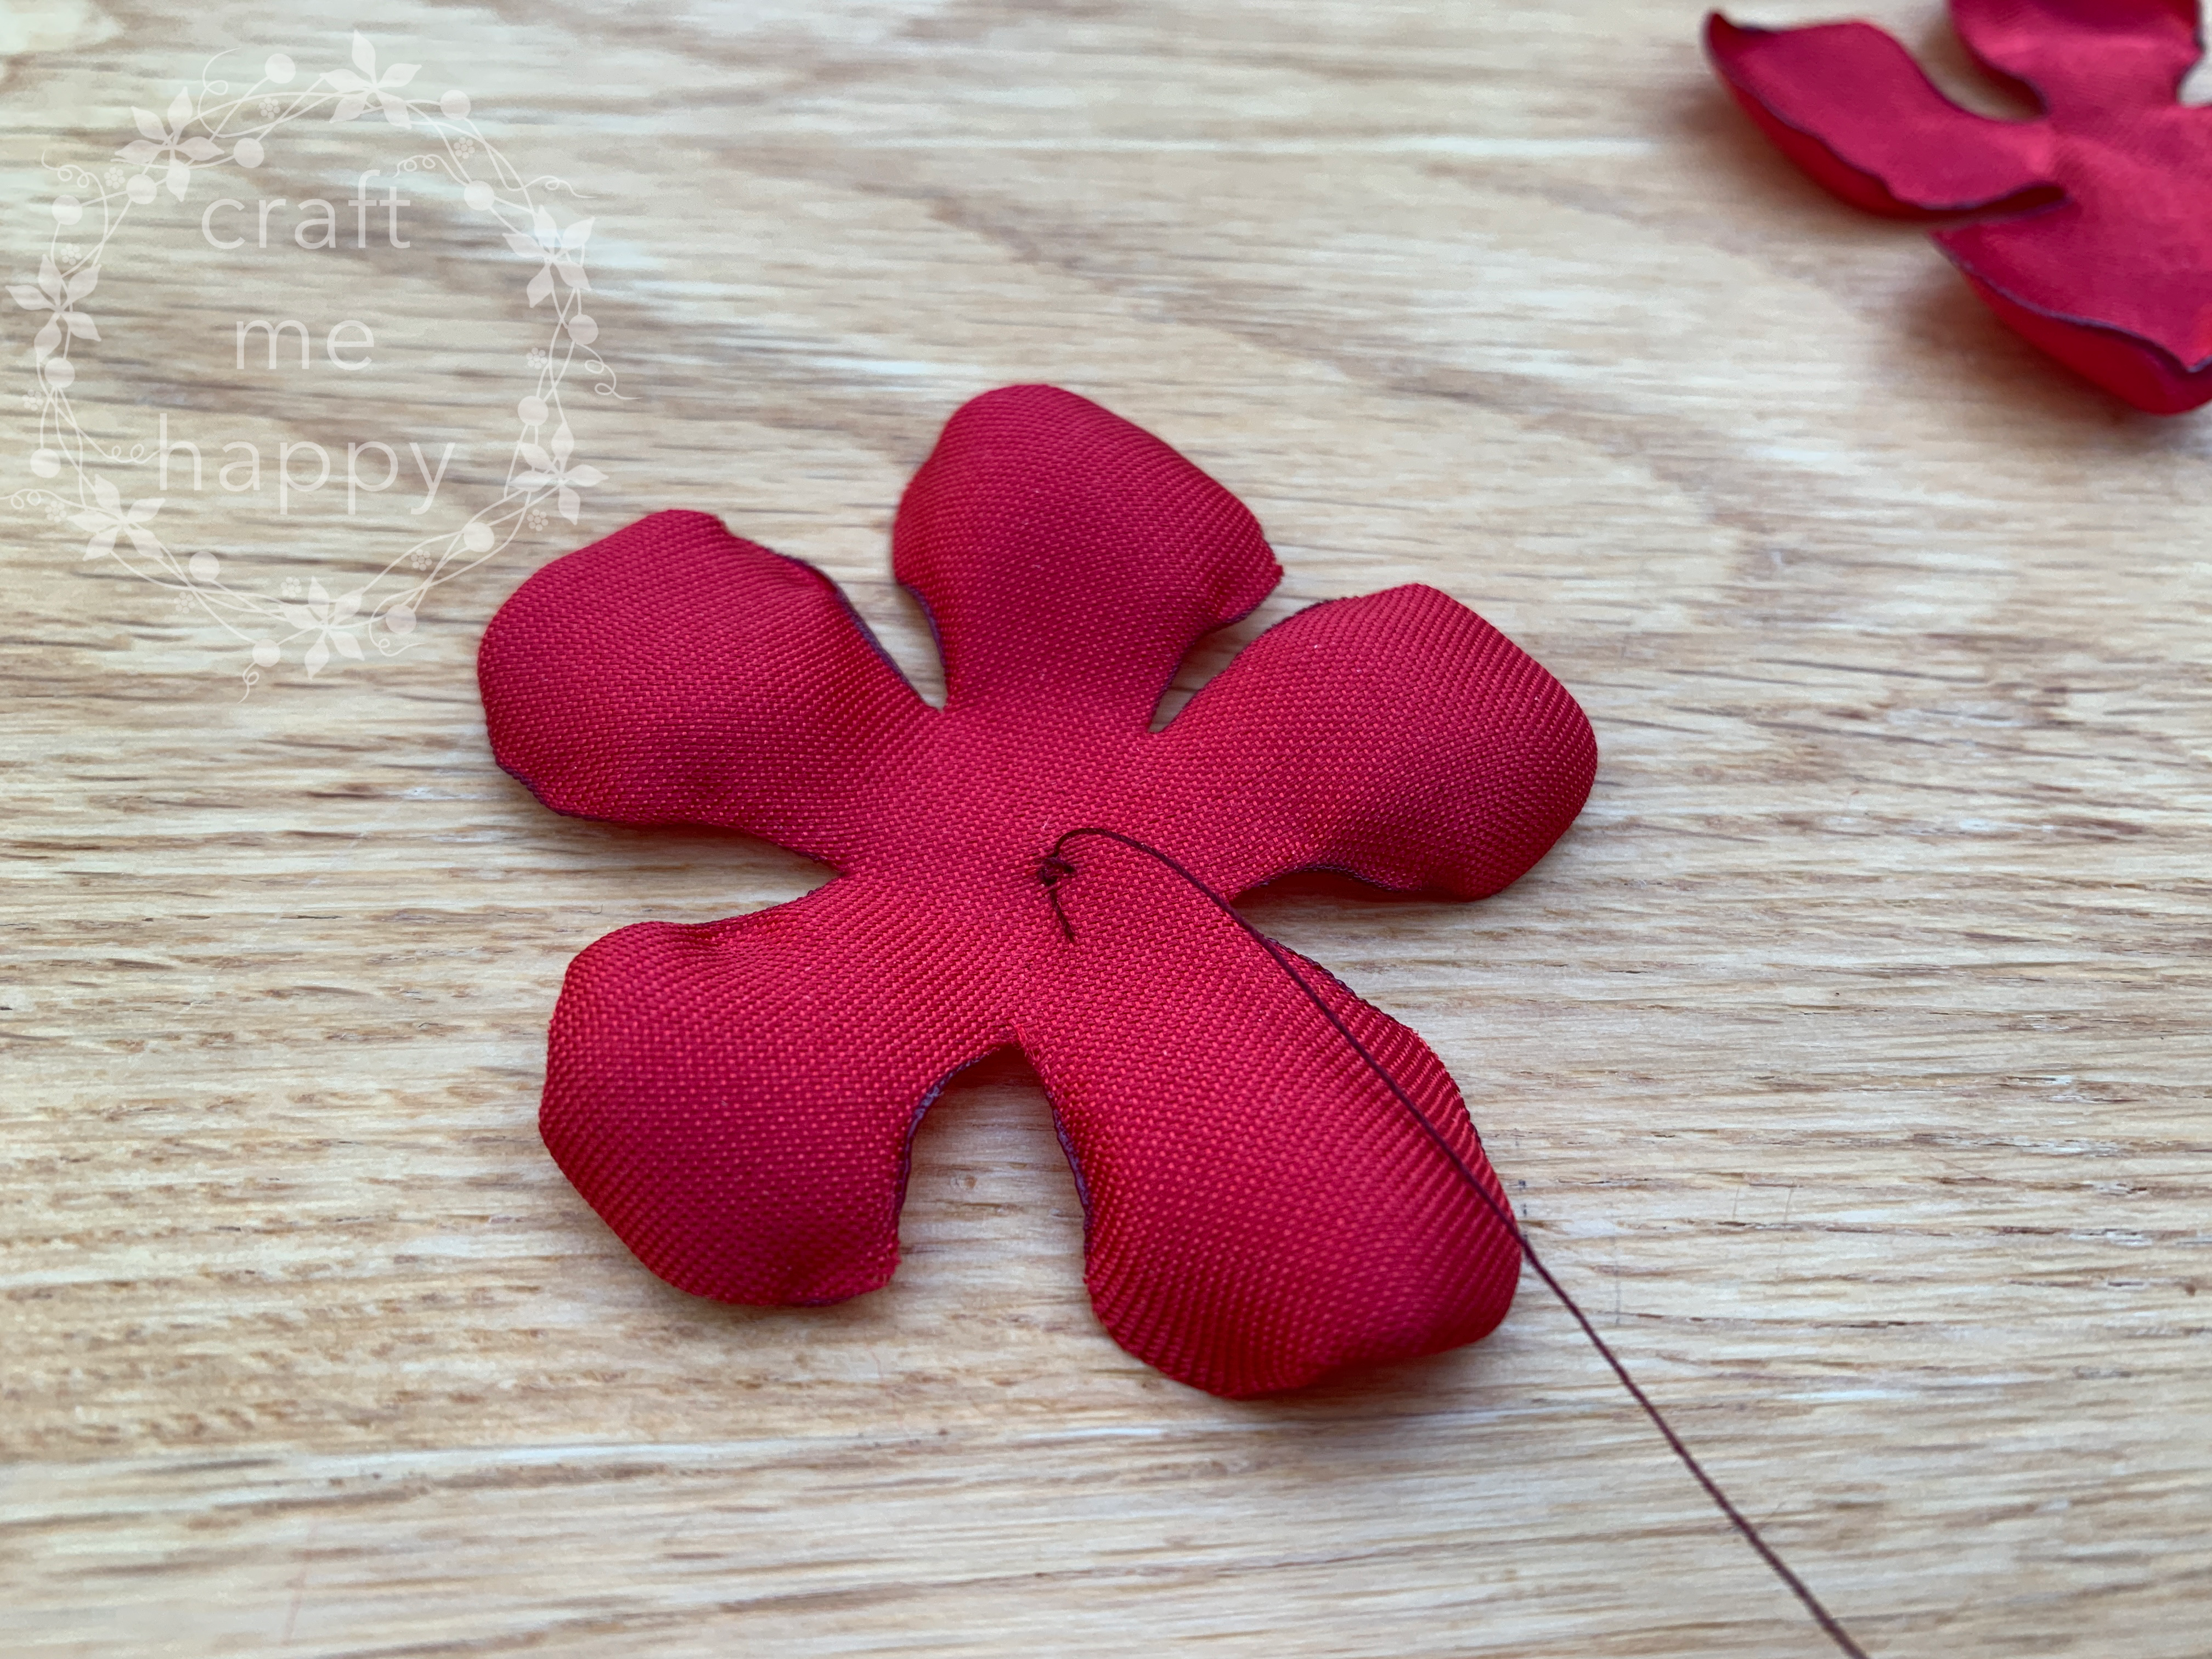
Thread a needle and work a few stitches on top of each other on the centre back of the biggest flower.

Insert the thread into the centre back of the second large flower and position it so that the petals sit above the gaps of the lower flower. Work a couple of small stitches to hold it in place.

Keep layering and stitching the flower petals on in this way until you’ve stitched all 6 flowers together.
I couldn’t decide on the style of flower I preferred, so I made two -

For the first one, I ran a circle of stitches around the middle of the flower.

I then pulled the thread through to the back of the flower and pulled it to gather the petals together.

I then worked a few stitches on top of each other at the back to secure everything in place.

For the second style, I didn't gather the centre, instead, I sewed 6 Swarovski crystals in a circle shape to form the flower centre.

What do you think? I can't decide which style I prefer. A few of these will definitely bring another joyful element to my wreath. I've only got one more detail to add to my Joyful Wreath and then I should be able to start putting all of the different elements together. Eek!
If you've enjoyed this blog post, please pin this image to Pinterest. It makes a big difference to me and helps other crafters find it too.
Related Blog Posts -


----------
Please be sweet and share the love. Leave a comment, subscribe to my YouTube channel, like my Facebook page for regular updates or follow me on Pinterest, Bloglovin' or Instagram
1 comment:
Hey Kathryn,
Your singed flowers are amazing! And I love your photos. Also, I wanted to drop a quick message to let you know that I featured your tutorial on Crafts on Display, a growing community of crafting enthusiasts. You can check it out here – https://craftsondisplay.com/sewing/how-to-make-singed-flowers-31937/
Post a Comment