


There are many ways of measuring handspun yarn and I’ve tried most of them. After a while, I learned that my most favourite method was to very slowly count the number of rotations my yarn swift took to empty a bobbin, (trying not to lose concentration), measure the length of a single loop of washed yarn and then multiply it by the number of rotations of the hank winder. Inevitably, I would almost always end up losing count when I got into the few hundreds and so I would have to go back later and count every single loop of yarn. Either way was either very laborious or extremely frustrating.
A few months ago, wollwebfarben posted on Instagram about a turns counter app that she had discovered to count the rotations of her swift. This was a game-changer! I was so intrigued, I downloaded the free app straight away, played with it for a little while, bought the full version, and then put it away until I had a serious amount of yarn to measure.
 |
| Turns Counter on the App Store |
It's a very simple and unassuming app, originally designed to calculate the number of turns when winding inductor coil. I doubt very much that the developer realised just how useful it could be for hand spinners when he programmed it. The app cleverly uses the phone's built-in magnetic field sensor to detect when a magnet has passed over it and so, with a little creativity, it can be set up to count the rotations of a yarn swift or hank winder.
 |
I recently finished plying 500g of 6ply merino/silk to knit the Camelia cardigan from Refined Knits.
 |
| Camelia from Refined Knit |
This was the first time I’d used the turns counter in earnest, so there was a little bit of a learning curve, but once I managed to calibrate everything properly, I was ready to go.
Materials needed to measure the length of handspun yarn
- Swift or yarn winder
- iPhone or iPad with the Turns Counter app installed. (There are also a couple of ‘magnetic counters’ on the Google Play Store, but I don’t have the technology to try those.)
- Neodymium magnets
- Waste yarn and scissors for tying the hank
- Metre ruler or tape measure

The first thing you need to do is calibrate the turns counter app. You somehow need to position the arms of your swift or yarn winder so that the ends will pass a few centimetres over your phone or tablet without touching it. I have a 30-year-old umbrella hank winder, which did the job pretty well. I was able to lower the main part of the yarn swift so that it sat just above my iPad on the table it was clamped to.

With the magnet well away from the phone or iPad, and the swift in the desired position, touch the zero in the top right to calibrate the device.
My yarn swift’s frame is mostly steel, which makes things interesting...

My stack of neodymium magnets attach themselves to the swift arms securely, but initially, I found that the app was counting the end of every metal arm as it passed, so I had to experiment a little bit to find the ‘sweet spot’. I had to spend a good few minutes altering the magnets’ distance from my iPad and increasing the threshold level until it was only counting up when the magnets passed.
If the arm ends of your yarn swift are non-ferrous you would need to either glue a magnet onto there, or wrap some steel wire around the end so that you could attach a neodymium magnet.

It took a little trial and error, but the moment I got this to happen was very satisfying!
If you look carefully, (and ignore my shaky camera work,) you can see that I’ve got the threshold set to 50. (All of the functions I’ve used so far come with the basic free app.)

Attach the start of your yarn to the swift using your preferred method. I like to wrap the end of my yarn around itself several times on the second pass to hold it in place. As I'd made two loops around the hank winder I used the plus symbol to move the counter onto 2.
Now it’s time to fill my yarn swift in the usual way...

I made this short animated gif of the turns counter in action, but I’ve made a YouTube video where you can see it in a much better resolution.
I mentioned earlier that I’d bought the full version of the turns counter app. This was purely because I wanted to be able to take a photo of my yarn on the swift with the turns count on the image.

I could certainly have managed with the free version, but as I often take days or weeks to see a project through, it helped to quickly record the count in my photos app so that I had a visual reference.
To prepare your handspun yarn for washing, tie it in four places, wrapping the yarn through the middle, in a figure of eight.

Then give your yarn a wash and a rinse. Soaking it relaxes the yarn and allows the twist to even out and set. Washing also removes any oils that entered the tops during the blending and combing phase at the mill. Depending on the fibre, you will probably also find that yarn will have puffed out and so it will probably be thicker and shorter than before its soak.

I tend to just add a splash of shampoo and leave it to soak for a while, then rinse and squeeze off the excess water in a towel.

...Then leave it to hang to dry. Unlike some spinners, I don’t hang a weight on my yarn while it dries as it can prevent it from shrinking and I’d rather it shrank before I knitted it. I have read that hanging a weight on yarn is advisable if you’re going to weave with it though.
Once it’s completely dry, it’s time to measure the circumference of the hank. It’s much harder to work out the circumference of an extremely large skein compared to one with much fewer loops

I’ve actually got three hanks to measure - two quite large ones and a small one that is 6 plied from the end of a couple of bobbins.
As all of the yarn was spun and washed in the same way, from the same fibre on the same skein winder, I can use the smaller skein to find out the approximate circumference of all of them.
Pull the hank tight with both hands and lay it down on the floor. It’s important that you don’t put any tension on the yarn as it’s very easy to stretch it at this stage.

With a tape measure or metre ruler, measure the length of the skein in its relaxed state and double it.
In this case, the circumference of my skein is 2 x 71cm = 142cm. Of course, the larger skeins would have a slightly larger average circumference as the yarn builds up further away from the central loops as it wraps around the skein winder, but it’s always better to underestimate how much yarn you have.
So the turns app tells me that I have 24 + 395 + 175 = 594 rotations of the yarn swift.
594 rotations x 1.42m = 843.48m

So hopefully I should have enough yarn to knit the Camelia cardigan.

I like to wind my yarn into a centre-pull ball and attach a handspun yarn label so that I can work out how much yarn I have left over when I've finished my project.
I’m so glad I learned about the turns counter app! In the past, I would have dithered and procrastinated when it was time to wind off and measure my yarn, but this does my least favourite part of the task for me.
This blog post contains Amazon affiliate links to similar products that I purchased myself. If you click through and purchase, I will receive a very small percentage of the purchase price.
At this point, I normally suggest similar related blog posts, however, my list of spinning-related content is becoming a little unmanageable... If you'd like to read more blog posts about spinning and fibre preparation, please take a look at this page here where you will find links to all of my spinning and fibre articles.
Thank you for reading, and happy spinning!
If you enjoyed this DIY, you might enjoy some of my other spinning-themed blog posts -


 |
| Free Handspun Yarn Labels |
 |
| Spinning Dog Hair |
 |
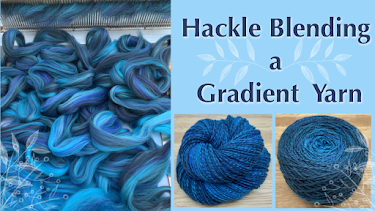
| DIY Hackle |

 |
| 3D Printed Modular Lazy Kate |
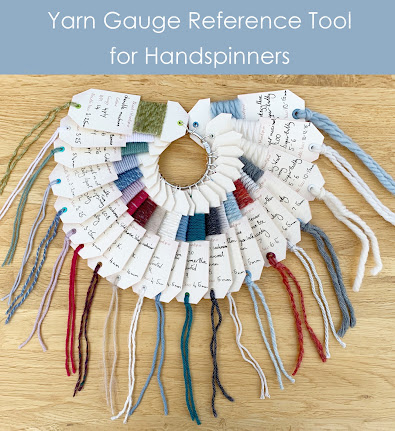 |
| Yarn Gauge Reference Tool |

 |
| Testing the Electric Eel Wheel Yarn Counter Prototype to Spin a 5 ply yarn |
 |
| Using the Electric Eel Wheel Yarn Counter to Sample Yarn Gauges and Ply the Yarn Weight I Want |


----------
Please be sweet and share the love. Leave a comment, subscribe to my YouTube channel, like my Facebook page for regular updates or follow me on Pinterest, Bloglovin' or Instagram
1 comment:
Swifts made by the Oregon Woodworker have this counter built in - no need for the phone.
Post a Comment