Tuesday, January 22, 2013

Oo-oo Word Wheel


My literacy homework this week was to make a 'Word Wheel' to help Maisie with her spelling, reading and phonics.

If you haven't seen one of these before, the idea is that the top wheel has one phonic sound and the lower wheel has words going around it that use that phonic sound.  The top wheel has one or two holes cut out that reveal the changing letters - and therefore words - as the wheel is turned.

Well I spent so long making this, (not to mention that I quite impressed myself!) that I thought I would share it here.


If you fancy making your own, I used Photoshop and here's the very quick explanation -

I chose the 10 petal flower shape, as the petals seemed to lend themselves better to little hands than just a plain circle  As there were 10 petals, I rotated the canvas by 36 degrees every time I wanted to place one of my words into the individual petals.  I then designed a smaller top flower and typed on the word 'school', to the right of my centre dot, as this was my longest word.  I then covered the beginning and last letter with rectangles to be cut out later.  I added a 'cuckoo' clipart as my daughter knows that the cuckoo is the Jolly Phonics reminder for the 'oo-oo' or 'u-oo' sounds.

There was a bit of trial and error to ensure that the lower words had been placed in exactly the right place, but it mostly involved rotating the lower wheel by 36 degrees, copying the upper wheel, pasting it over the lower wheel, reducing the opacity of the upper wheel so that both sections could be read at the same time (placing the centre points together) and then nudging the words until they were in exactly the right place.

I made the lower wheel bigger, purely because we'd been shown wheels in class made of 2 circles that were both the same size, and these seemed awkward for an adult to turn, so I imagine they would prove tricky for a 4 year old.

I hope this is useful to somebody - it seems a shame to have spent so long making it, for it to be filed away forever...

Brownie points to those that can spot the 'odd word out'...

Clipart image reproduced by permission of Microsoft.

Here's the link to the lower part

and here's the link to the upper part


----------
Please be sweet and share the love. Leave a comment, like my Facebook page for regular updates or follow me on Pinterest,  Bloglovin' or Instagram


Thursday, January 17, 2013

Make your own unofficial Mr Man Mug. OR...The Big Pinterest Sharpie Myth


Like so many of my projects, this one was very much a case of trial and error.  I'd seen post after post of pins on Pinterest about how you can draw on ceramics with Sharpie pens, bake them in the oven and then you have a lovely personalised gift that's washable and pretty durable... well - big shock - it's not.

I'd bought my big mug and I was all excited to draw on my lovely design as a Christmas present for my husband.

I was pretty pleased with the result - it was black and white, minimalist and unique...


However after 2 weeks of very careful washing, the ink was clearly coming off...


... and after just a bit of scrubbing with a kitchen towel and some glass cleaner, the design virtually all came off.

So I couldn't leave it like that, I ordered a ceramic pen from my local art shop and when it arrived, I set out to trace over the remains of the first design properly.  However, I should have ordered one with a fine point, as the ink from the pen flowed much too thickly for my liking.


Oh dear, third time's a charm!

This time I (hopefully) did it properly...

There's a lovely website were you can design your own unofficial Mr Man.  It's very easy to waste 10 minutes just playing with different Mr Men - if you're that way inclined...  The design I used is personal to my husband - he has a name and everything!


My mug was a big pint mug, so I saved my image at 9.3cm tall.  I cut it out roughly and then scribbled all over the back in pencil.

I cleaned the area I was going to apply my design to with glass cleaner, taped on my image and then carefully traced over all the black lines in pencil.


This gave me a faint outline which I could fill with my paints...

Some parts came out thicker than others, so I left it a day and went over it again. 


Then after leaving it to dry for several hours I neatened all my edges with my fine black ceramic pen and left it to dry for 48 hours.
He's not perfect, but he's one of a kind.  Maybe I'll make a whole family of not so perfect Mr Men and Little Misses... maybe...  Let's hope he stays around, I'll keep you posted!

---
Here are the materials I used for my final mug -
  • 1 large pint mug
  • Some glass cleaner and kitchen towel to clean the mug prior to painting.
  • A print out of my own Mr Man design from here
  • A pencil to scribble on the back of the image and to trace around the outline.
  • Some sticky tape to attach the image to the mug.
  • A Porcelaine 150 Discovery Set.
  • Porcelaine 150 Fine Black Marker Pen.
  •  Some good quality paint brushes.
  • 1 domestic oven.
After leaving my painted mug for 2 days, (my paint was quite thick, so I doubled the recommended drying time) I put it in a cold oven and then heated it to 150 degrees C.  Once the oven was up to temperature I set the timer for 35 minutes, after which I turned the oven off and left it to cool.

The instructions say it's dishwasher proof, but I may avoid that cleaning method for a while.  Also, the paints aren't recommended for contact with food - not that they're toxic, but it's better to be safe.  They may chip off with a steak knife, for example.


----------
Please be sweet and share the love. Leave a comment, subscribe to my YouTube channel, like my Facebook page for regular updates or follow me on Pinterest,  Bloglovin' or Instagram


Thursday, January 10, 2013

What do you do when your daughter swallows her first tooth?


Well we knew that a visit from the tooth fairy was imminent.  Maisie had had a wobbly tooth for a fortnight, so we knew it could be any day.  She was so excited!

Then, on the day before Christmas Eve, she'd just finished eating her breakfast and she smiled at me and I saw it... or at least I saw the gap that remained.  I realised that she must have eaten her tooth, but we hunted high and low for it anyway.  She was devastated, bless her.  She's only 4 and a half, so she'd been looking forward to her first visit from the tooth fairy for 2 weeks - fairies are a big thing in our house!

I told her that if she fell asleep with a big smile on her face, then the tooth fairy would see that she'd lost a tooth and pay her a visit. Unfortunately Maisie wasn't convinced by this idea and she said she was, "too sad to smile," so I had to think of something else.

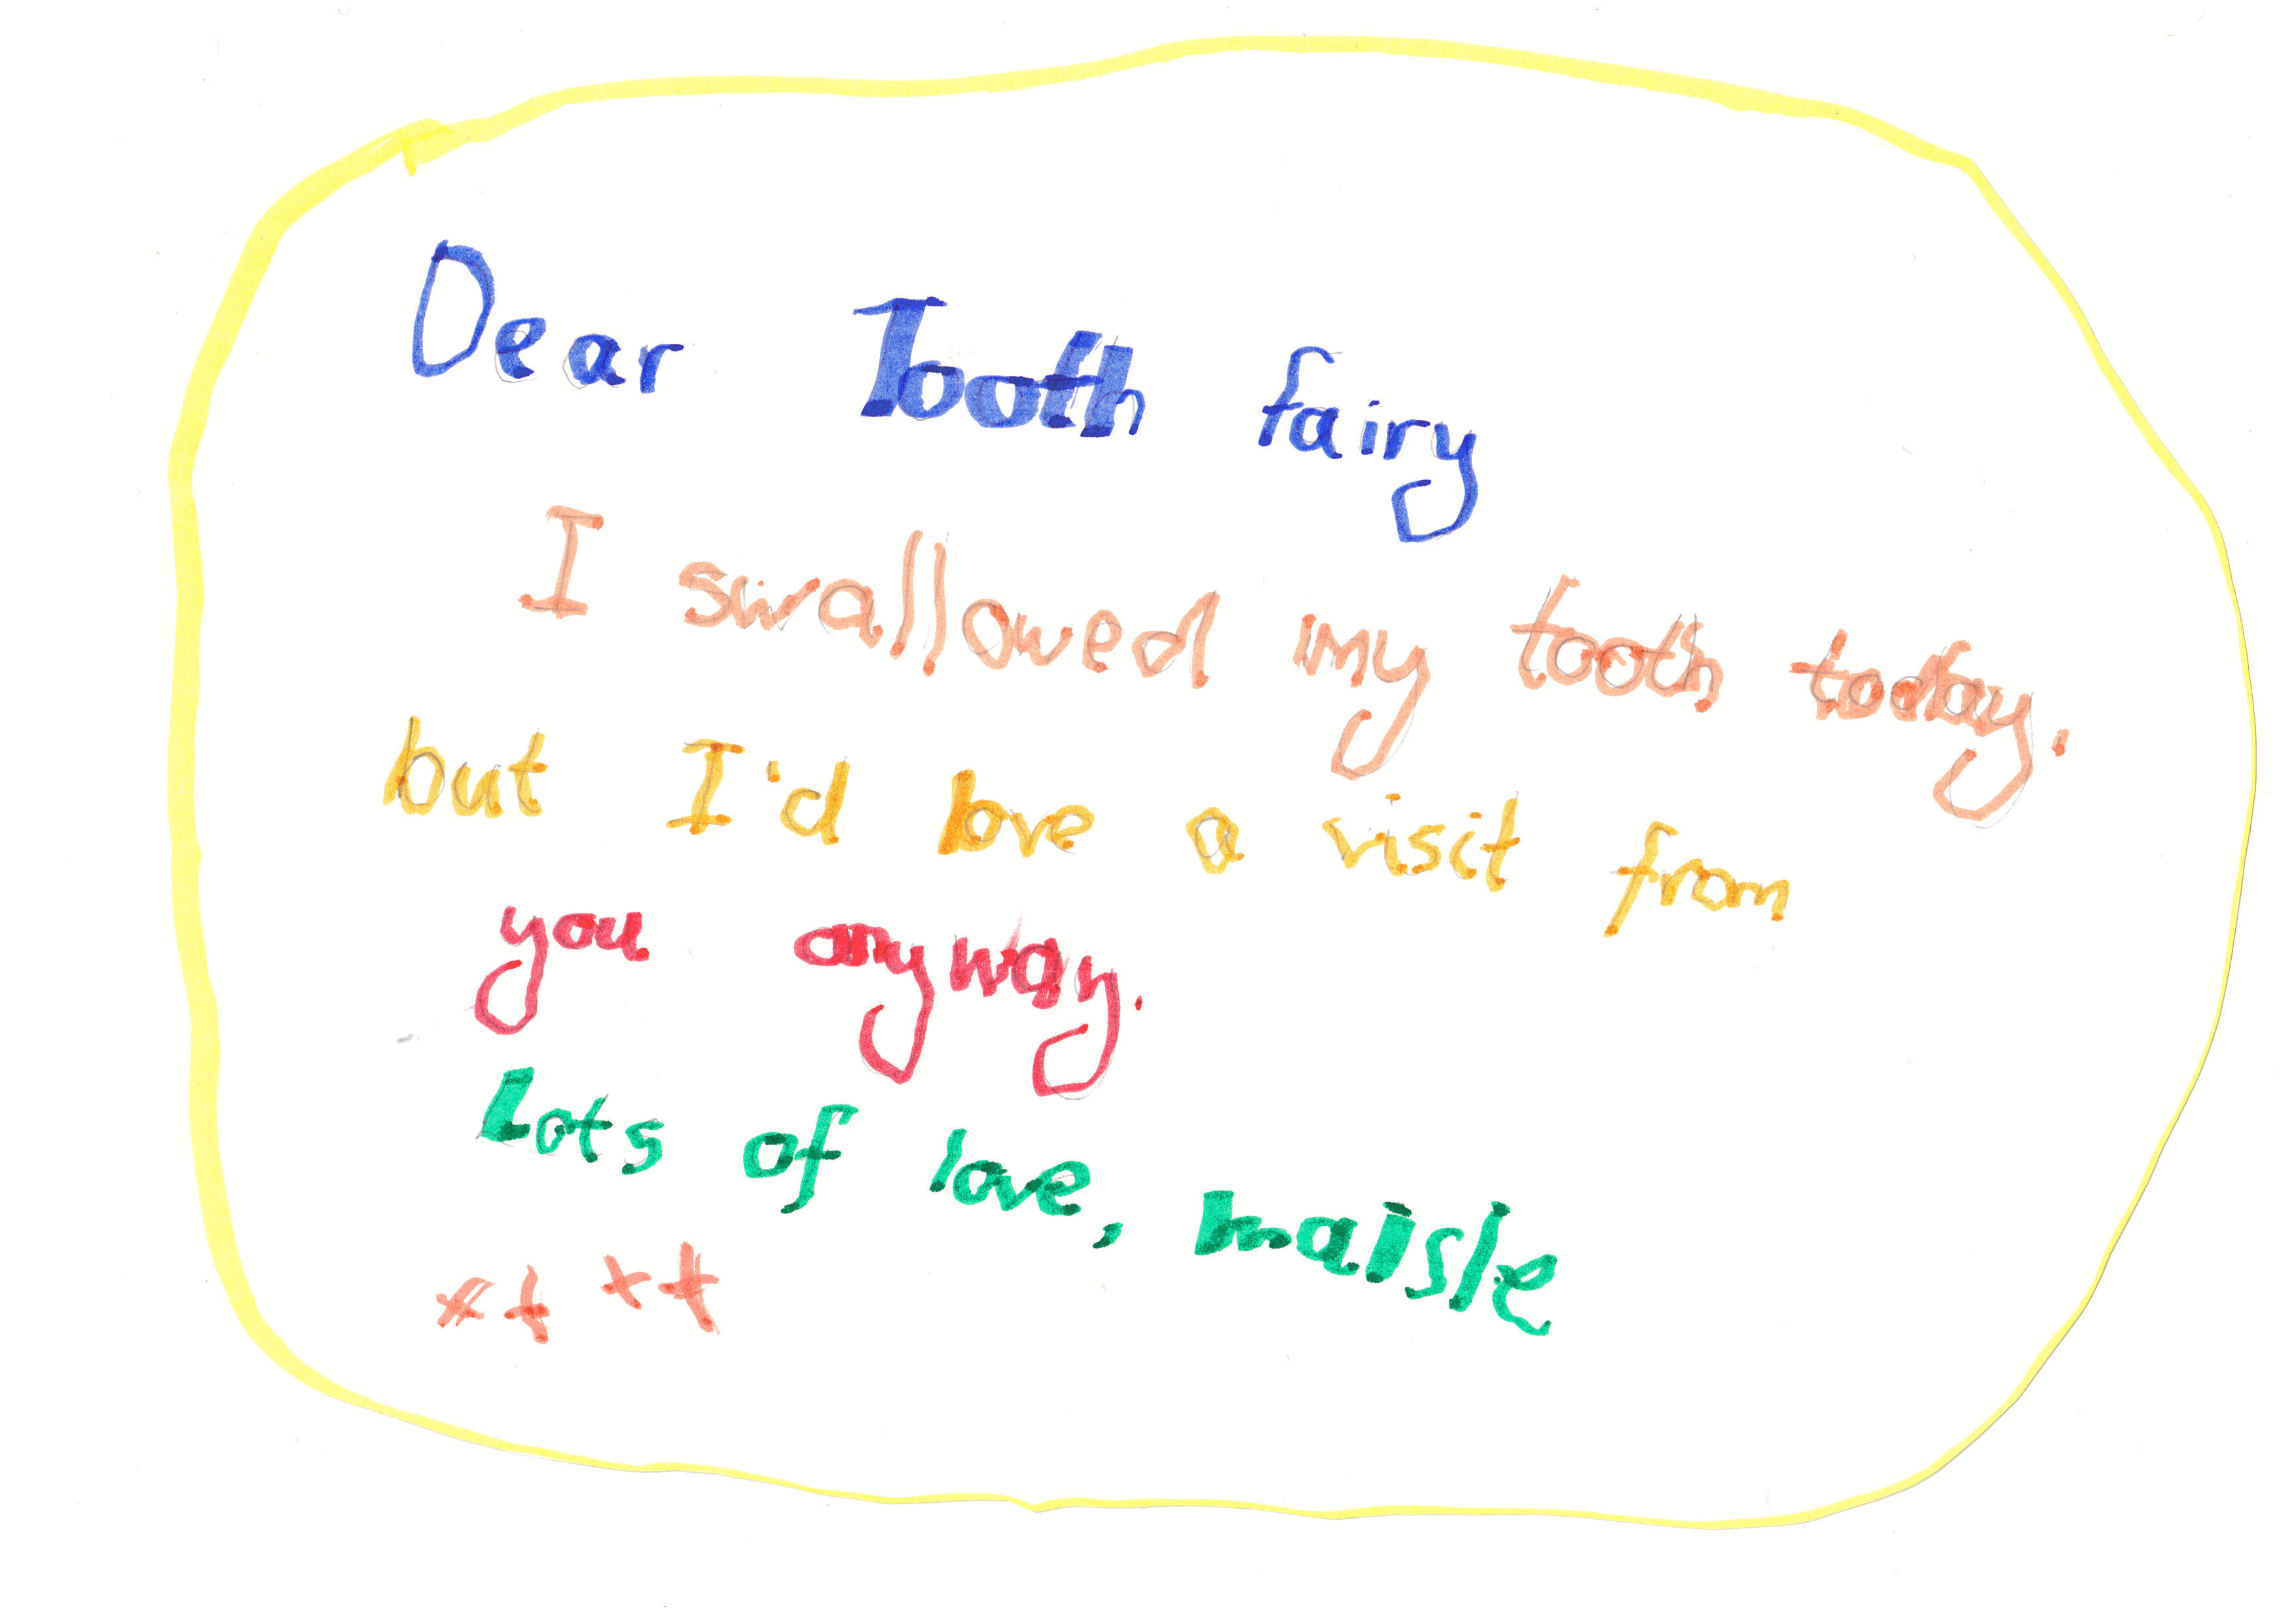
The only other thing I could think of to calm her down was to tell her that we'd write a letter to the tooth fairy, because, as we all know, fairies check every night to see if there are any teeth to take away, so surely, on her many travels, she'd spot a letter to her ...

We thought for a while on the best message to write and between us, we came up with this -


"Dear Tooth Fairy, I swallowed my tooth today, but I'd love a visit from you anyway.  Lots of love, Maisie x x x x"

This actually seemed to placate her and she went to bed unusually happy that night.

Of course when  a little girl writes to the Tooth Fairy, it's only polite for her to write back. This was her reply...

"Dear Maisie

Wow! Congratulations on losing your first tooth!  I'm so proud of you, you're growing up so fast!
Thank you for your lovely letter, your writing is beautiful!


I'm sorry you swallowed your tooth. Never mind, you can keep that one, I have plenty more.

Here's a shiny coin to say 'well done'. I'm looking forward to seeing you again soon.


Lots of love
The Tooth Fairy"

I printed the letter using Grace font in 20pt, so the text is quite small and 'fairy like', but big enough for her to read.

... and a letter from the Tooth Fairy needs an envelope.

I didn't have much time, but this is what I came up with -


I just drew a basic pattern on paper and then cut it out of 1 piece of felt.


Then I folded it into shape and blanket stitched along the seams and the single edge in one continuous stitch and embroidered a little flower onto the flap.


To add a bit of fairy sparkle, I dusted around the stitching with my Dovecraft decorative shimmer chalks.


Maisie has since lost another tooth, but thankfully didn't eat that one!  She used the envelope to put her tooth in, which we were all very happy about, as it saved us hunting around for it in the middle of the night.


---------- 
Please be sweet and share the love. Leave a comment, like my Facebook page for regular updates or follow me on Pinterest,  Bloglovin' or Instagram