


I've been making Christmas decorations for my local Maker Space, and the theme for the Christmas tree this year was "Let's have a greener Christmas!". We aimed to use surplus craft items and biodegradable materials to make decorations out of objects that might otherwise have been thrown away.

Occasionally our Maker Space is given yarn from people clearing out their yarn stash and someone kindly donated 7 balls of this green crochet yarn to our craft group. I thought I'd have a go at knitting some plastic-free tinsel as a pet and environmentally friendly alternative Christmas garland. It's also a great way of using up leftover yarn - Be warned, a little woolly tinsel uses a lot of yarn!
I posted an image of my green knitted tinsel on my Instagram feed and several people asked me how to make it so I thought I'd write up a tutorial here -
If you'd like to see the YouTube video I made, you can get a quick overview of how I made the autumnal red tinsel here.

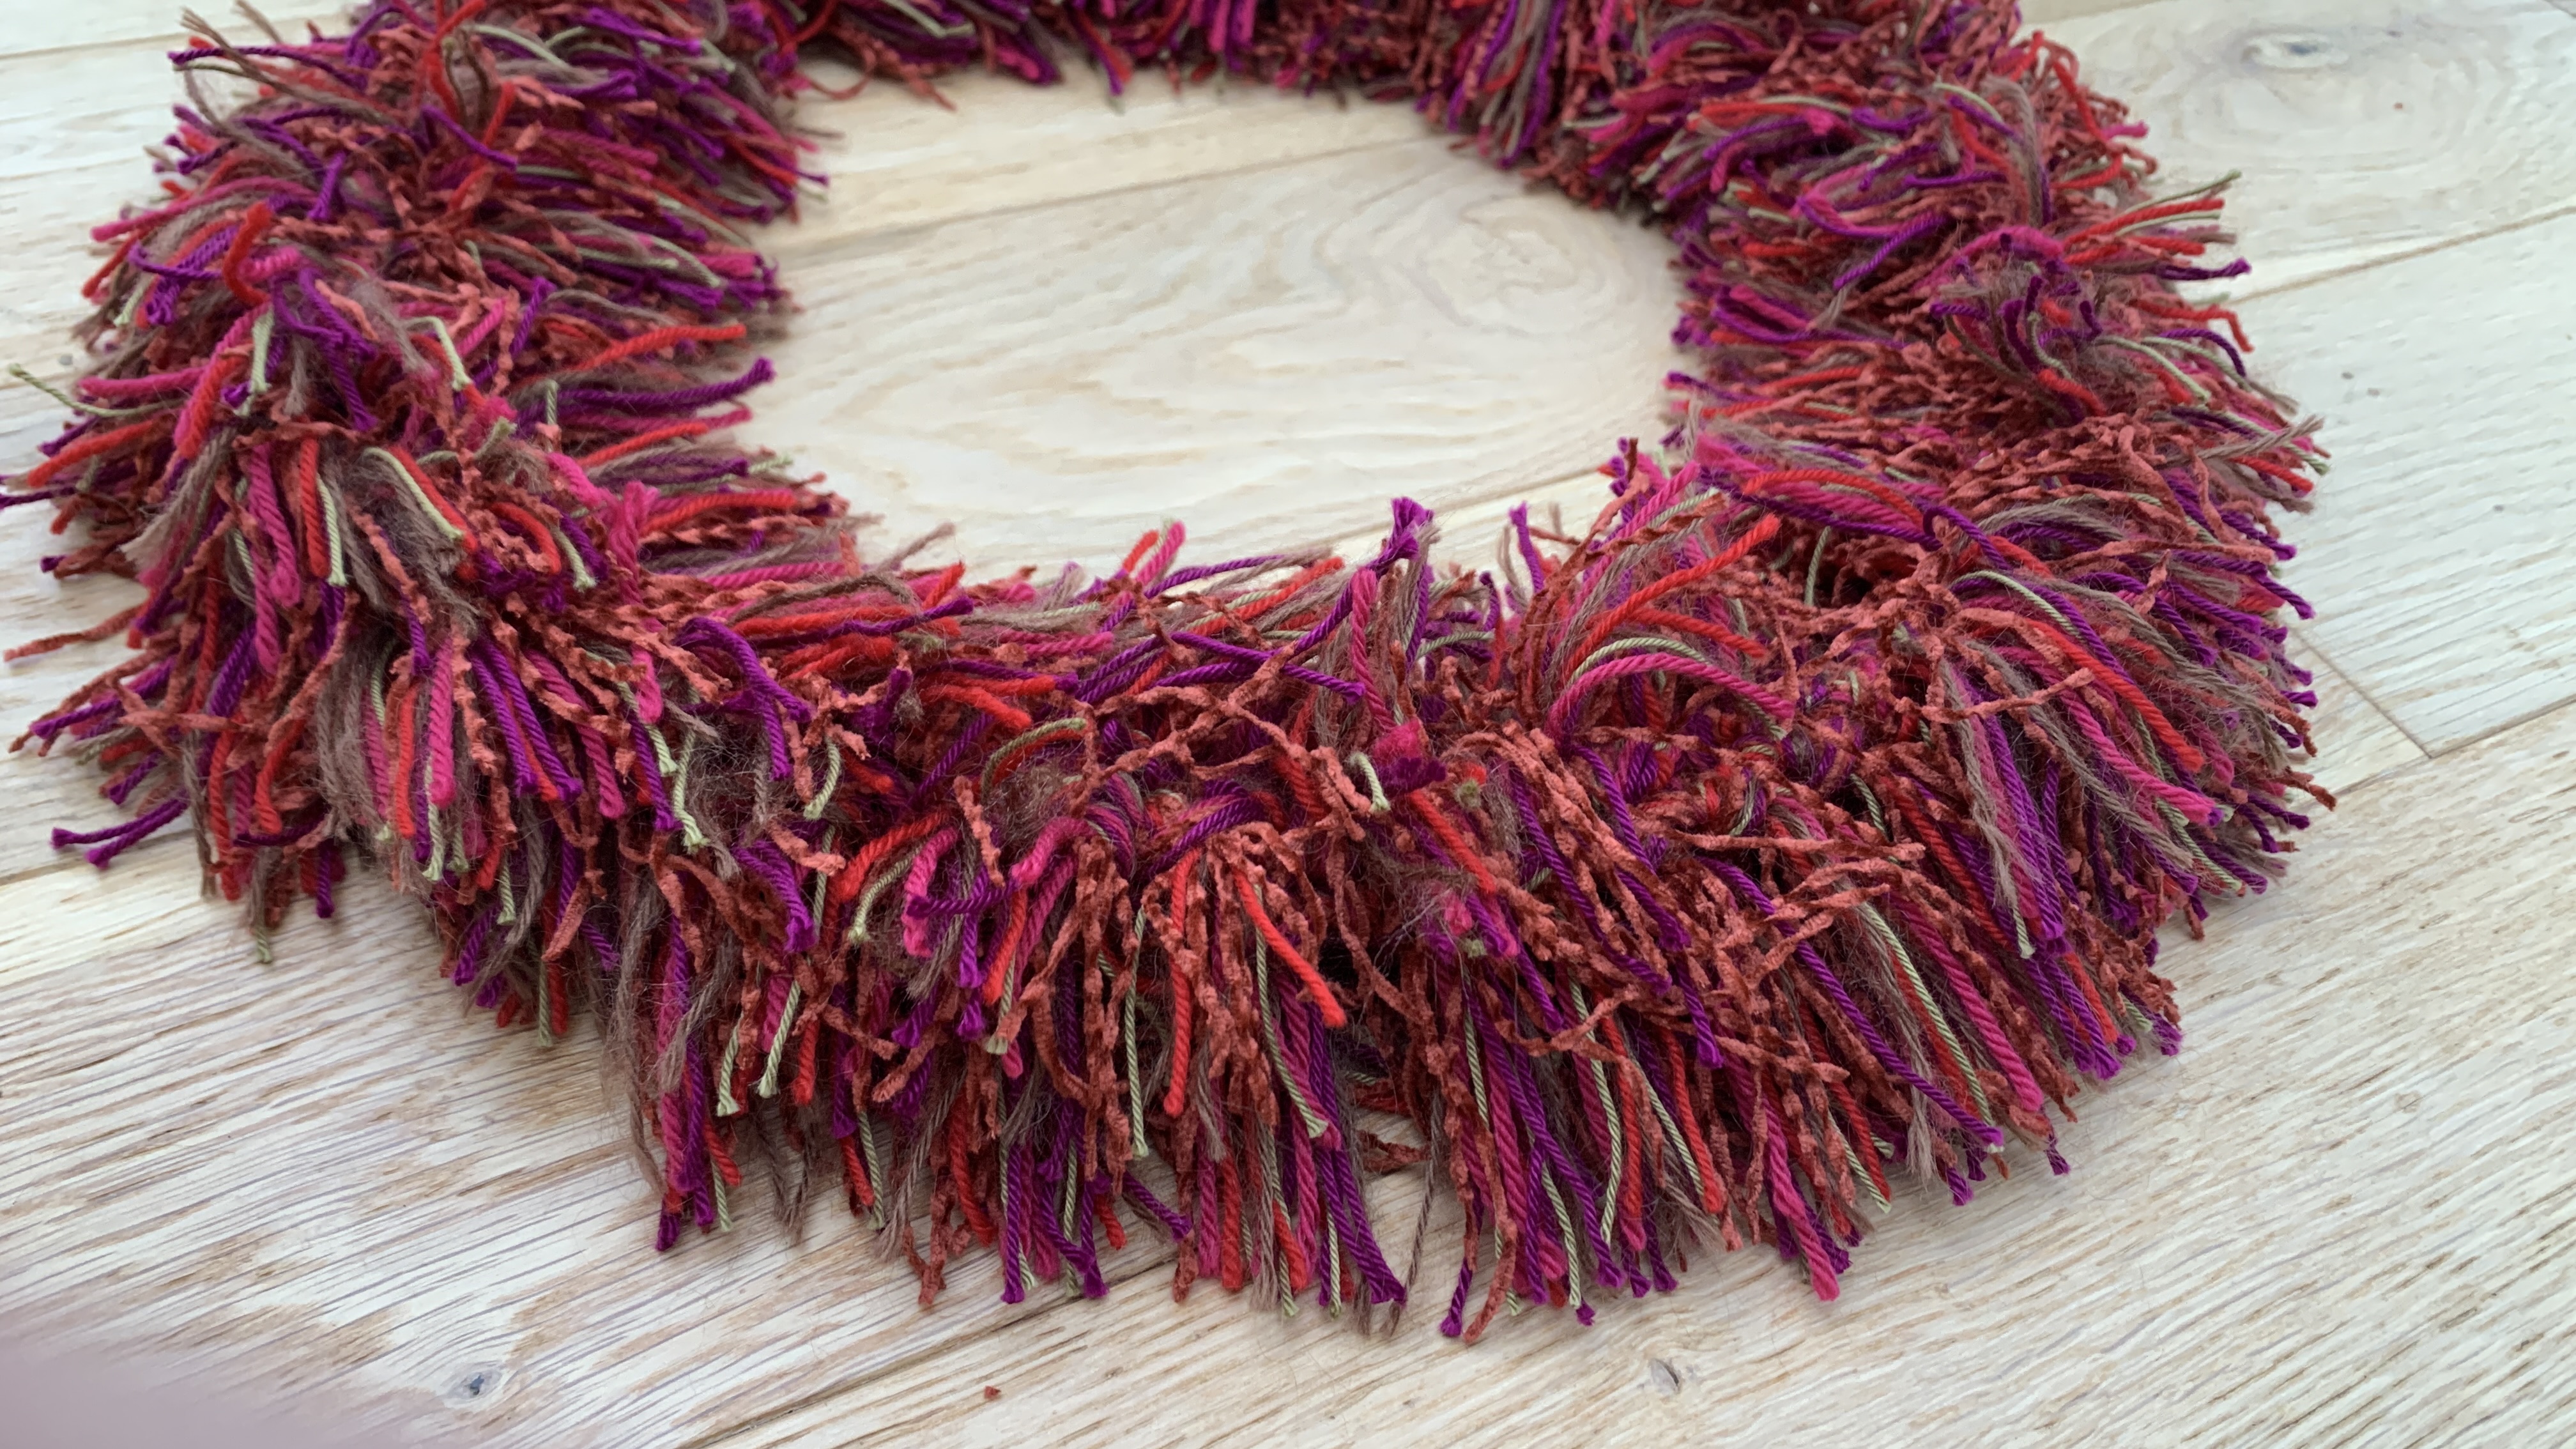
I collected together several balls of commercial yarn that I had no specific plan for. (This project is much too yarn-hungry to use my precious handspun yarn stash...) I could see that the red ball probably contained the shortest length of yarn so I wound this one into a ball first, measuring it with my Dreaming Robots Electric Eel Wheel Yarn Counter (affiliate link) as I wound. The yarn counter measured the red yarn at 74 metres so I programmed the yarn counter to beep when it reached 74 metres and I set to work winding this length off in all of the other yarns. (Of course, you don’t need the yarn counter but it did allow me to wind off multiple equal lengths of the same colour from one ball, without any wastage.)
(Having knitted 10 strands at 74 metres each, I would say that at least 100 metres of 10 strands would have been better - but this project was about zero waste tinsel and I wanted to work with what I had.)

As a guide, 10 strands at 74 metres each, knit up to about 105cm.

I eventually wound off 10 balls of yarn ranging in weight from lace weight to double knit.

Knitting from 10 balls of yarn simultaneously can get messy, so to make things a little easier, I wound them all into one big extreme knitting yarn ball.
Knitted Tinsel or Featherless Boa Instructions
Needle styles and sizes
I experimented with several needle sizes before I landed on the right balance of stitch tension and loop density. For this autumnal red tinsel, holding 10 strands together, I used size 12mm circular needles. When I knitted with 7 strands of green sock weight yarn I used size 10mm double pointed needles. Use the smallest size of dpn’s that will allow you to knit your chosen number of strands comfortably without the stitches feeling too tight to work with. If the stitches are too loose you won't achieve the effect of a dense fur fabric.

The actual knitted stitches should be fairly hidden underneath a shaggy pile of yarn.

Double-pointed needles are ideal for knitting I-cord but circular needles, as I used, will also get the job done.
Cast on
Using large double-pointed needles, and holding multiple strands together, cast on 4 stitches.
Work EVERY stitch as a loop stitch. That’s it! Just keep on repeating. When you reach the end of your 4 stitches, slide all of the stitches on the right needle to the far end and keep on working a 4-stitch, loop stitch i-cord without turning your work. With i-cord, the 4 stitches will naturally form a tube without you needing to turn your work.
Loop stitch instructions
Knit into the stitch as normal, but instead of pulling the stitch off the left needle, bring the yarn to the front, between the needles, and wrap it around your thumb. Bring the yarn to the back between the needles again and knit into the back of the stitch this time. You’ve just increased 1 stitch. Insert the left needle into the 2 stitches on the right needle and knit them together.*

Here’s an animated gif of how I work the loop stitch. A lot of people just pass that increased stitch over, but knitting them together adds an extra level of security. This yarny tinsel is far less likely to shed its fibres than regular plastic tinsel!
Keep knitting until your tinsel is as long as you want it, or you run out of yarn. Cast off in loop stitch.

Tug all of the loops tightly and cut them. This is quite a laborious task so I would recommend a good film, a warm drink, and a comfy sofa.
*I should say that I'm pretty sure it would actually speed things up to cut every loop just after you knit each stitch as all 10 strands are more likely to be sitting together (making it easier to cut them all at once rather than having to wrangle the yarns individually.) However, I prefer the flow of knitting all the loops and then cutting them all in one session, rather than stopping after every stitch to cut the loop. I would first try cutting the loops after every stitch and see if it irritates the heck out of you...
And now you have non-plastic, pet-friendly, zero-waste, woolly knitted tinsel.

Hang it on the tree, or wear it around your neck like a featherless boa!
I think I have a bit of an obsession with the loop stitch as this must be the 4th blog post I’ve written about it!
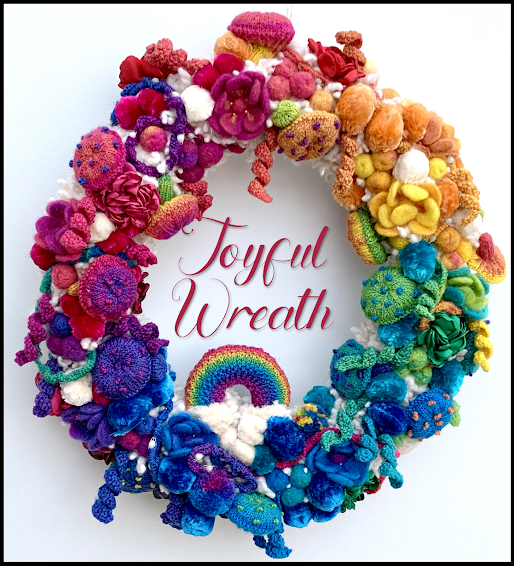 |
You can read how I used it to form the base for my Joyful Wreath.

as well as the Bohemian Wreath that I made 3 years ago.

If you’ve found this post interesting or useful, please Pin this image to Pinterest. It makes a big difference to me and helps other crafters find it too.
Happy Christmas!
----------
Please be sweet and share the love. Leave a comment, subscribe to my YouTube channel, like my Facebook page for regular updates or follow me on Pinterest, Bloglovin' or Instagram
No comments:
Post a Comment