


This post was originally uploaded on the 10th of March 2020, but it was updated on the 6th of May 2021 to reflect my continued learning experience with my DIY hackle and to add a slight improvement to the design.

Last year, when I was perfecting my technique for preparing and spinning dog hair, I made a makeshift hackle out of 3 combination dog combs. I found that my wool carders were just too coarse for the fine chiengora fibres and so I needed to improvise.

I’d never pulled tops from a hackle before and I loved the fibre preparation I got from it.

The fibres were beautifully aligned, open and pre-drafted and so it was a pleasure to spin from. Out of curiosity, I tried blending shades of merino tops on the more open tines of the dog combs and it worked pretty well, but if I wanted to do some serious colour blending, I would need something much taller, with slightly less dense tines.
I’ve recently been planning a big project which involves a significant amount of colour blending and so I looked into buying a hackle. I learned that a hackle can cost anywhere between £80 to £250 and the style I would want (with fine tines and alternating double row) would probably be around the middle of these figures. Of course, I can appreciate the time and craftsmanship that goes into manufacturing an elegant wooden hackle, but I don’t like spending that amount of money on something I could possibly make myself.
When I was researching how others had made DIY hackles, there were several things that people used for the tines or spikes. There seemed to be 3 options - finishing nails , cake breakers
 , or metal hair picks. I was leaning towards using metal hair picks
 as the tines were about the length and spacing I wanted, but some reviews mentioned the tines bending or breaking off - which concerned me.
, cake breakers, or metal hair picks. I was leaning towards using metal hair picks as the tines were about the length and spacing I wanted, but some reviews mentioned the tines bending or breaking off - which concerned me.
I was doing an image search for hair picks, when a picture of an onion holder/slicer popped up and I was intrigued to give them a try. They looked perfect and more robust than the average metal Afro comb.
I ordered 2 onion holders/slicers, just to see if they would work, and secured them into my tabletop clamp with lollipop sticks
 in between as spacers to hold the tines parallel.
in between as spacers to hold the tines parallel.
I was thrilled to find out that they worked perfectly and so I ordered 10 more onion slicers.
Materials and tools needed to make an onion slicer hackle
- 6 - 11 onion slicers/holders
depending on the width and finish of hackle required.
- Lollipop sticks
- Epoxy glue
- Wood glue
- Sharpie pen
- Long ruler
- Hacksaw
- Clamps
- Playing cards
- 1” x 1” wood off-cuts
- Sandpaper and block
- Dremel tool (optional)
- Paint or varnish (optional)


As a serial crafter, the only items I needed to buy to make my hackle were the onion slicers/holders .
.

I bought 10 more onion slicers/holders from Amazon . My thinking was that 6 onion holders would probably be sufficient for my needs, but it's better to make it too big than too small. I was also semi-buying spares in case I managed to break a couple.

.I bought 10 more onion slicers/holders from Amazon
. My thinking was that 6 onion holders would probably be sufficient for my needs, but it's better to make it too big than too small. I was also semi-buying spares in case I managed to break a couple.
With a Sharpie pen, I marked where I wanted to cut the onion holders.

I then used my tabletop clamp to hold the onion holders in place and removed the handles with a hacksaw.

To make sure my tines were level, I butted them up against a wooden metre ruler.

Once I was happy that the tops of my onion holders were level, I used epoxy glue to attach lollipop sticks along the length of the onion slicers to join them all together. You may notice that there is a slight gap between the plastic of the onion holders. This is so that the tines will alternate perfectly when they are set against the second row of spikes.

After 5 minutes, I flipped the first row of onion slicers over and repeated the process of attaching lollipop sticks to the onion slicers with epoxy glue.

I repeated the process to make the second row of the hackle.

At this point, you may want to skip forward several steps, as I'm sure having bigger gaps between some of the spikes wouldn't be the end of the world; it would still give you a usable hackle. However, I still had two spare onion holders and the perfectionist in me wanted to make an uninterrupted row of spikes.

I held one of the onion holders in the clamp and set to work, hacksawing off individual spikes. I was actually quite reassured at how securely the spikes stayed solidly inside the plastic.

Here are my individual spikes with their little heads chopped off.

The gaps between the onion holder handles were very small and so I had to grind down the plastic quite significantly to get them to fit.

These are my little spikes and their remaining plastic handles - reduced down to fit between the onion holders.

With epoxy glue on the plastic ends, I slotted my extra spikes between the onion holders.

It was now time to attach my two rows of spikes together. I put wood glue onto one row of lollipop sticks and glued both hackles together, making sure that the teeth alternated and the tops and bottoms were level. I used several playing cards, sandwiched between the spikes to hold everything parallel, leaving the wood glue to dry for a good half an hour.

I had some spare 1" x 1" lengths of wood that I wanted to use as a base for my hackle and so to raise the spikes up between the base, I made some shims by gluing 3 sets of 8 lollipop sticks together with wood glue.

While the wood glue was drying, I set to work trying to make my lengths of wood look a bit more finished.

As you can see, my woodworking skills are a little lacking, but I sanded off all the rough edges and corners as well as I could.

With wood glue, I attached my lollipop shims to the base of what was going to be the inside of my hackle.

Then used wood glue on the lollipop sticks to attach the hackle to the inside of the wooden base. I clamped the whole thing tightly in place for half an hour.

Once the wood glue was set, I smeared a very generous amount of epoxy glue to the parts where the plastic of the onion holders touched the wood of the base, to strengthen the whole thing further.

Finally, it was time to add the second length of 1" x 1" to the other side of my hackle with wood glue...

... and I left it to dry, clamped together.

I could have said that it was finished now, but as this project is all about colour, I decided to paint it one of my favourite colours.

I gave it a colour wash of duck-egg blue, with a dry brushing of satin white.

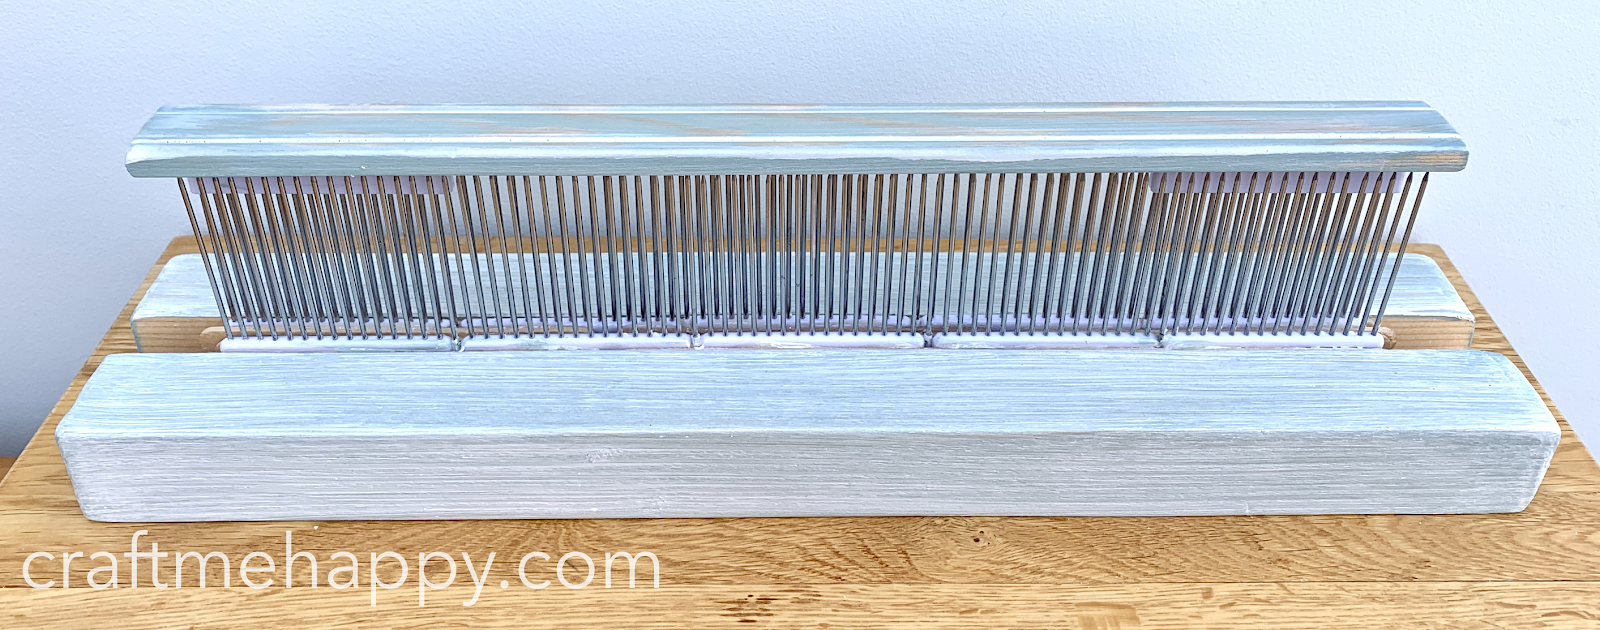
As my hackle is likely to be sitting out on a desk and those spikes are VERY sharp, I thought it might be prudent to make a protective top for my hackle.

Each onion holder came with a little cover to shield the points. I attached a plastic cover on either end of my hackle and then glued some moulding to the top of the plastic covers to hide the points when I wasn't using my hackle.

I've never used a commercially made hackle before, so I can't make a reliable comparison, but I'm so pleased with how my onion holder hackle works. It helps me make the most beautifully blended tops and I've easily saved over £100.
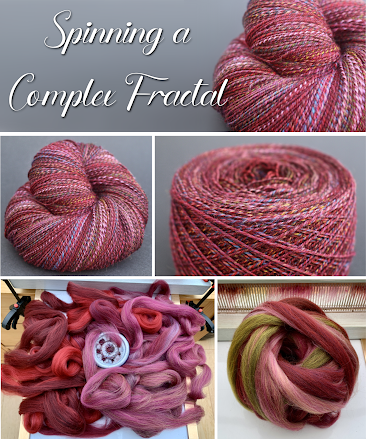
Here's a video of how I blended the pulled top on the right.
---
UPDATE - Well I've been using my DIY hackle for over a year now and I'm glad to say that my onion slicer hackle is still going strong. My blending skills have significantly improved and I've finally mastered how to pull fibre off the hackle with a diz. I've been working on a long-term "Blending a Spectrum" project which means that I've probably blended over 200 different colours on it.

This was my first attempt at blending 24 colours using just red, yellow and blue...

... and this was after over 150 colour blends on my hackle. Practice makes progress!

For most of the last year I've been blending very small amounts on my hackle, using just a small section of the hackle width and not much more than 5g of fibre...

However recently I've been stretching the capabilities of my hackle, blending about 40g on there. I'm not sure what the limit on my hackle is, but I will say that once I got over 25g on there I noticed that I had a problem with the fibre riding up and coming off the top of the spikes - even with the spike cover on there.

To fix the problem, I glued together three lollipop sticks, using a further two on top and then attached these to the front side of the plastic spike protectors so that the sticks sit in between the top of the spikes. As you can see, this now prevents the fibre from slipping between the slight gap above the spikes.
I'm so pleased with my onion slicer hackle and I'm now hearing from people that have made their own from my instructions, which makes me so incredibly happy!
In the first video I made of me pulling fibre off my hackle, I drafted it by hand because I could not get to grips with using a diz. I thought I'd post an updated version where, after practicing hundreds of times, I think I've nearly cracked it!
---
This blog post contains Amazon affiliate links to similar products that I purchased myself to make the onion slicer hackle. If you click through and purchase, I will receive a small percentage of the purchase price at no extra cost to you.
At this point, I normally suggest similar related blog posts, however, my list of spinning-related content is becoming a little unmanageable... If you'd like to read more blog posts about spinning and fibre preparation, please take a look at this page here where you will find links to all of my spinning and fibre articles.
Thank you for reading, and happy spinning!
Recommended Posts


 |
| How to Measure Handspun Yarn Using an App |
 |
| Free Handspun Yarn Labels |
 |
| Spinning Dog Hair |

 |
| 3D Printed Modular Lazy Kate |
 |
| Yarn Gauge Reference Tool for Hand Spinners |
 |
| Testing the Electric Eel Wheel Yarn Counter Prototype |


----------
Please be sweet and share the love. Leave a comment, subscribe to my YouTube channel, like my Facebook page for regular updates or follow me on Pinterest, Bloglovin' or Instagram
2 comments:
Thank you for this tutorial! Do you know the advantage of the double hackle vs the single? Or why you would use one over the other? Thank you.
Thank you, I’m glad you found it helpful!
I believe that a single row hackle is better for coarser fibres, whereas my double row onion slicer hackle works well with merino and other similar fine wools.
I actually found this hackle to be too coarse for preparing chiengora and the three rows of dog combs worked much better. Chiengora is a much shorter, finer fibre which needs tines that are even closer together than the ones on my onion slicer hackle.
Post a Comment