


Over the last couple of years, I’ve spent a lot of time working on my hackle blending skills. More recently, I’ve taught myself how to blend uniform colours with my home-made wool combs. Both of these methods are suitable for worsted yarn spinning, and are invaluable for removing the shortest of fibres to spin a more durable yarn.
Whenever I post a video of myself combing wool, someone will almost always ask me what I do with the discarded short fibres. Sometimes I use them for stuffing or felting, but mostly I’ve just been putting them aside until I have enough different coloured fibres for an interesting project.
Well, I can no longer fit any more waste fibres into the box that I was storing them in, so it’s time to spin them up.
I’ve made a video showing the process of spinning the final finished yarn from start to finish, and you can see my technique for core-spinning waste fibres here.
As I don’t own a drum carder, I spun the core-spun yarn from the cloud. When I began, I was core-spinning each colour, one after the other, but I quickly learned that it was much more efficient to grab a handful of mixed coloured fibres and fluff them all up together to open up the fibres.
This helped to consolidate the colours a little, allowing me to spin smoothly from one colour to another. I wasn’t aiming to blend the colours, I just wanted to create a cloud of fluff that would allow me to spin continually from it, without too much stopping and starting.
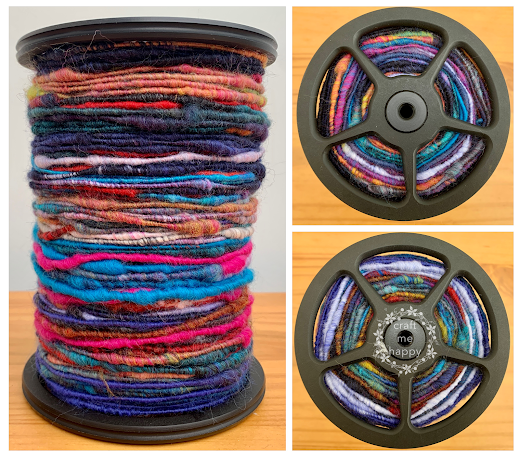
All of the yarn was spun and plied on my Hansencrafts Minispinner. Here’s how a completed bobbin looked. At this stage, I hadn’t quite decided how I was going to ply it.
Although I’ve been spinning for a few decades now, I’ve spun very few core-spun yarns and even fewer fancy or art yarns, and so I decided to play around a little with different plying methods and materials. A couple of the yarns were plied with themselves, while others were plied with chenille yarn or sewing thread.
I wanted to see how they knitted up, how the plying affected the colour, but I also balanced these factors with how much I enjoyed spinning and knitting with the yarns.
Here are the results of my experiments -
For this yarn, I added some clockwise twist to my chenille before I coiled my core-spun yarn around the chenille base yarn. I learned that the chenille created too much friction, making it difficult to push the core-spun yarn towards the wheel. This yarn was also quite springy, as plying the coils added a lot more anti-clockwise twist than I had anticipated when first adding clockwise twist to the chenille. I do like the chunks of colour though.
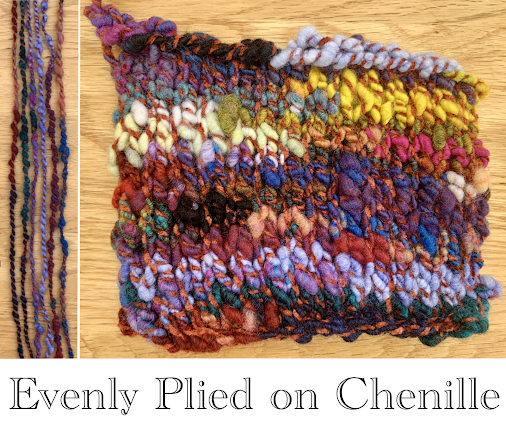
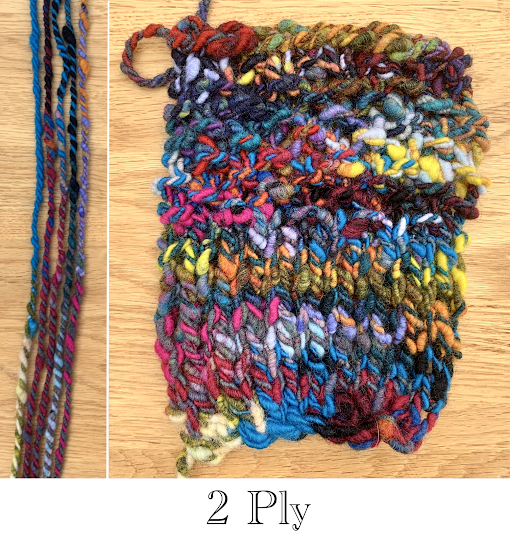
This yarn was plied using the traditional method of having the singles plied evenly, being held side by side as the twist enters the yarn. I really liked this yarn. It was quick to spin, easy to knit, and I liked the colour patterns created when it was knitted. Being able to see the chenille yarn throughout also seemed to bring all of the colours together somehow. It was just a little too flat and reserved looking, compared to some of the others.
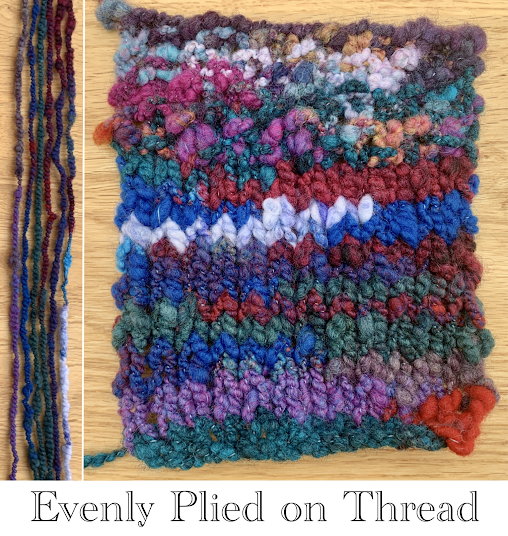
This was the finest and most reserved of the sample yarns, knitting up into a heavy Aran weight yarn. Hand spinners would describe this as a gimp yarn as the fine thread combined with the thicker core-spun yarn creates a fun crimped effect. It was quick and easy to spin, but it was also the flattest looking of all of the yarns once knitted up.
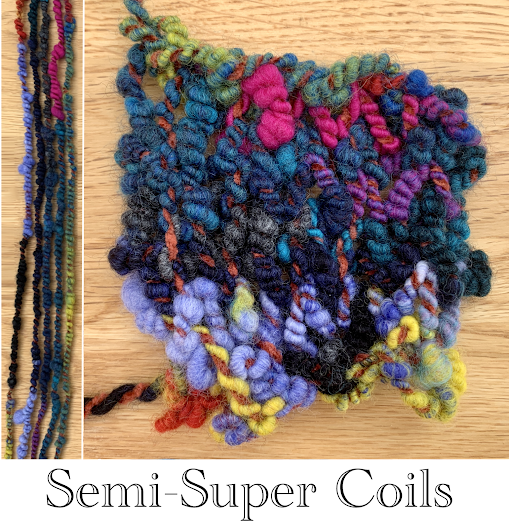
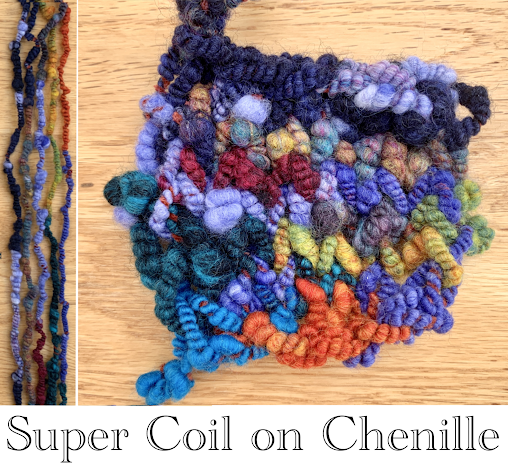
I’m calling this a ‘semi-super coil yarn’ as the core-spun yarn wasn’t quite held at a perpendicular angle to the chenille it was plied with, and the coils weren’t pushed up the base yarn towards the wheel (as they are in a supercoil yarn). I liked the look of this yarn, but it was not enjoyable to knit. As the coils didn’t wrap tightly around the chenille, I found that they moved around quite a bit while I was knitting with it, which is why you see big chunks of ‘barber poling’ chenille, and then other sections where the coils have bunched together. This yarn would have benefited from a second plying with a fine thread to hold the coils in place.
I didn’t mind this yarn, it was easy to spin and knit with, but I felt that the barber poling was just a bit too much, and made it just a bit too busy for my liking.
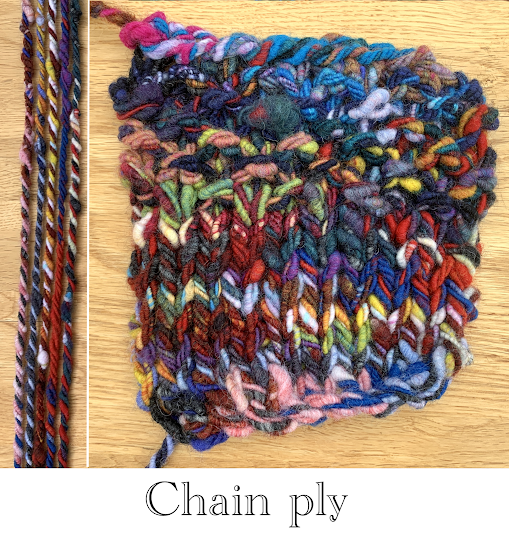
Unsurprisingly, this technique created the chunkiest yarn. While it was easy to spin and knit with, the amount of barber poling is also just a bit too much for me.

Visually, I think this one is my favourite - although as you can see, I need to use a much stronger base thread! I used a machine embroidery thread, which broke while I was casting on and casting off. Next time, I will try a heavier upholstery thread. The supercoils worked really well on the smooth thread though, as it was very easy to push the coils up the thread, making them bunch together with lots of texture. I also loved the bold chunks of colour this technique creates. Despite not adding clockwise twist to the thread before plying, I found that this yarn was much more balanced than the supercoil yarn plied with chenille. I’m guessing this is because a finer thread can take a lot more twist than a thicker yarn before it starts to become ‘lively.’
———
Spinning a Supercoil Yarn
I've always admired the beautiful supercoil yarns that I see in my Instagram feed. Their organic, freestyle, nature is so far removed from the fine, even, semi-worsted yarns that I'm so used to spinning, but as I don't weave or make tapestry wall hangings, their construction has always been a mystery to me.
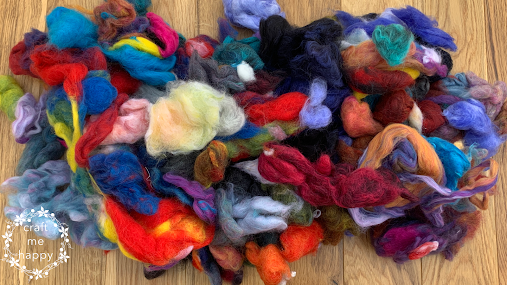
The first thing I did was empty out all of the fibres onto the floor. I had some waste fibres from sweater spins, but most of it was from my spectrum and CMYK blending experiments; it was fun to sort through and be reminded of all of my spins over the last two years. I broke every colour section up into much smaller pieces as I wanted an even distribution of different colours throughout my yarn.
Once I had a mound of small chunks of fibres, I tossed them around and mixed them up until all of colours were evenly spread out. I wanted to be able to put all of the fibres back in a bag, and just pull out handfuls of mixed-up coloured fibres.
Once I had a bagful of mixed-up colours, I would reach in and grab a handful. I tried not to be particular about the colours, but if I did find that I had too much of one colour, I would put a section back. Random yarns are completely outside of my comfort zone, and so I couldn't help assisting the randomness along, even at this stage.
Making a cloud of fibre video
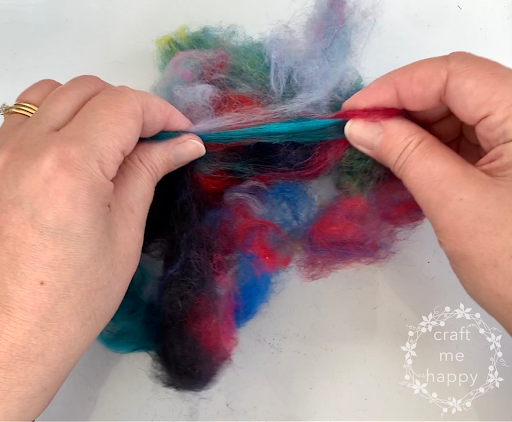
All of the fibres had been stored, compressed down into a big pile and I wanted to spin them from the cloud. To do this, I just grabbed a handful and pulled at all of the fibre sections to open them up until I had one big, fluffy mound. This made spinning from the cloud so much easier as I didn't have to keep stopping and starting to rejoin another colour, and the different coloured fibres blended and transitioned in interesting ways, rather than in sharp, contrasting colour changes.
To spin the core-spun yarn, I drafted out the fibres with the finger and thumb of my hand holding my base yarn, and then I just allowed the fibres to wrap around my chenille yarn. All of the chenille yarn was covered, and if I missed a section, I would just go back and draft over the exposed chenille. If my fibre stopped drafting, I would just allow a newly drafted section to pass under and around the chenille until it had latched on. As you can see, I'm drafting almost perpendicular to the chenille yarn and so with each rotation, the preceding fibres get partly covered by the later fibres, holding all of the fibres in place.
I knew that if I was going to spin a super-coil yarn, I would have to manage the anti-clockwise twist entering the base yarn. When I was researching the technique, I noticed that quite a few spinners wrap the base yarn around a drop spindle or Turkish spindle and allow the excess twist to exit the base yarn this way. I use an e-spinner and I'm significantly more comfortable sitting in a slightly reclined position and so I didn't want to return to the upright spinning position that would be necessary if I had a spindle dangling between my knees.
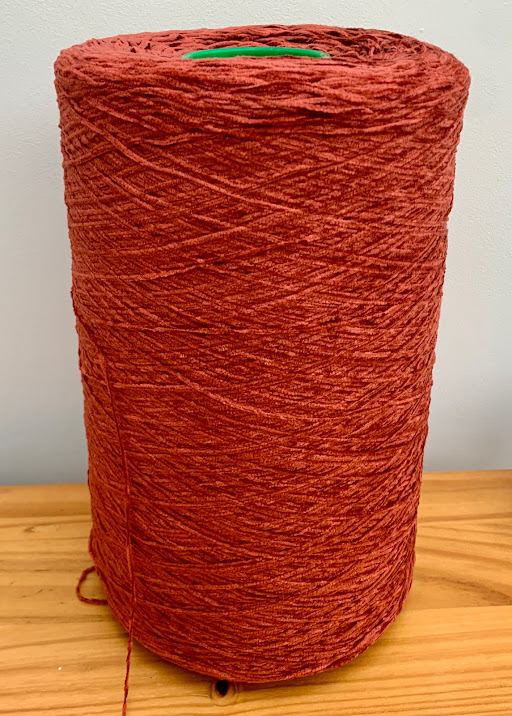
During my test spins, I'd added clockwise twist to my chenille base yarn but not the thread-based yarn - and the yarn with a thread base was still significantly more balanced than the chenille one. From this, I concluded that a strong, fine, smooth base thread makes an ideal base yarn for super-coil yarn and so I bought some Guterman upholstery thread. The colour of the thread didn't matter as it was going to be completely covered with super-coils. I was able to buy this quite cheaply at my local Boyes store, but I suspect that any upholstery thread would do the job.
As a precautionary measure, I ran a full bobbin of thread through my Nano and onto a bobbin at 1000rpm, feeding it in at a steady pace. My hope was that this clockwise twist would help to balance out any excess reverse twist that might enter the base yarn during plying.
To begin the super-coil yarn, I simply knotted my thread and core-spun yarn onto my leader and started my Hansen spinning in an anti-clockwise direction.
After a short while, I was able to increase the speed of the wheel and just allow the core-spun yarn to wrap freely around the base, and I entered a rhythm of pushing the coils towards the wheel every second or so.
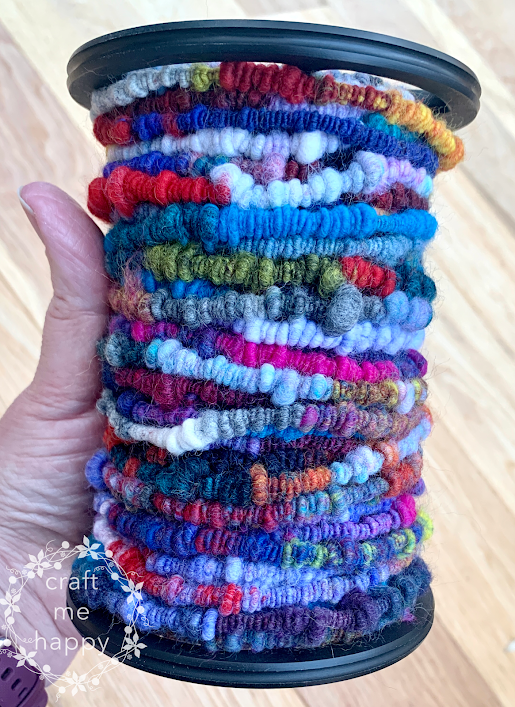
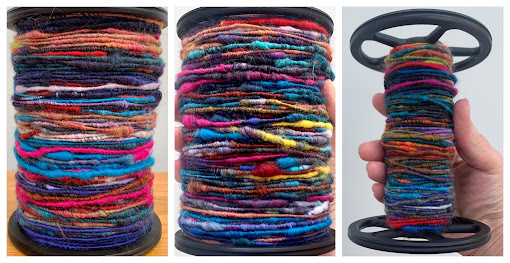
Here's a close-up of the super chunky supercoil yarn on the bobbin. I can totally see why some spinners almost exclusively spin supercoils, but anyone that sells supercoil yarn has my full and total respect. This yarn has been so much fun to spin - but also incredibly time-consuming! It took me about a week to spin and ply all of my fibre and yet, at the end of it, I only had about 55metres of yarn to show for it.
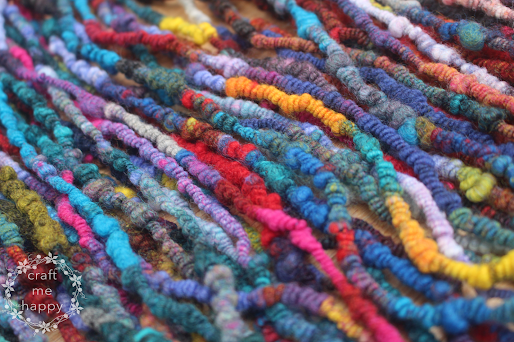
The texture is amazing though! After a good soak, there was no excess twist left in my supercoil yarn, so I'm really pleased with my first proper attempt at spinning supercoils.
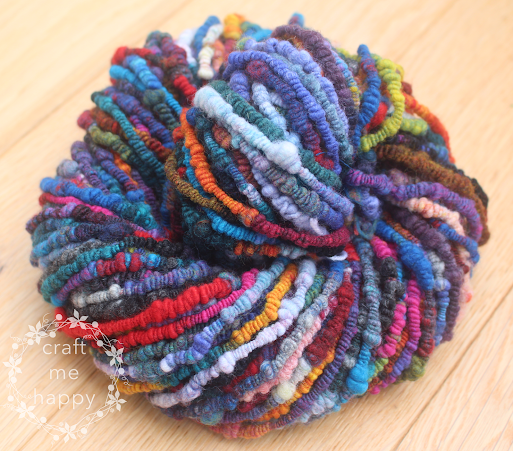
The yarn is very dense though, and as I don't weave, I wanted to finish off this blog post by knitting something a little different with it...
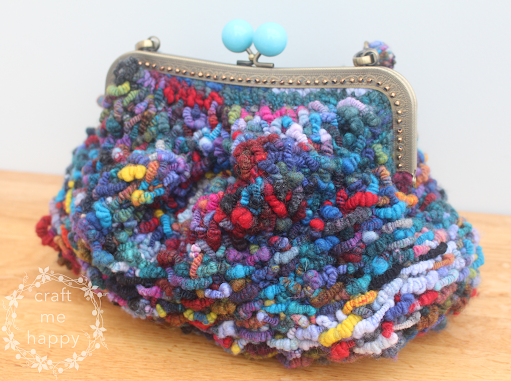
... and so I knitted myself a purse!
It's totally ridiculous and fabulous, but I love it!
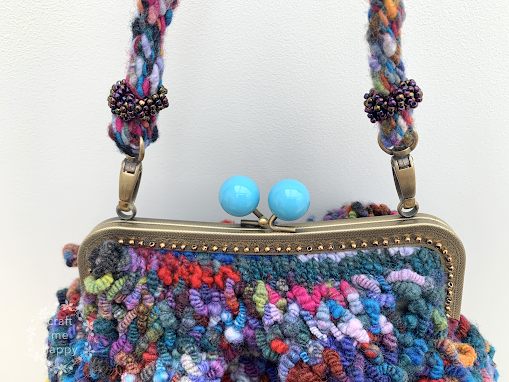
I managed to incorporate some of my earlier test spin yarns too. I needed a finer yarn to finish off the section that is sewn into the frame (my purse wouldn't close with the super chunky yarn at the top) and so the core-spun yarn plied with thread worked well. I also managed to make a kumihimo strap out of 8 strands of my earlier 2 ply yarn.
All in all, it's been a fun project that I've learned a lot from and I'll definitely continue to save my fibre waste so that I can look forward to spinning more fabulous yarns from leftovers in the future.
At this point, I normally suggest similar related blog posts, however, my list of spinning-related content is becoming a little unmanageable... If you'd like to read more blog posts about spinning and fibre preparation, please take a look at this page here where you will find links to all of my spinning and fibre articles.
Thank you for reading, and happy spinning!
Recommended Posts


 |
| Hackle Blending a Long Gradient |


----------
Please be sweet and share the love. Leave a comment, subscribe to my YouTube channel, like my Facebook page for regular updates or follow me on Pinterest, Bloglovin' or Instagram
1 comment:
Thank you for your generosity sharing your research! What a beautiful yarn and an FO!
Half an hour ago I found two multicoloured leftover braids and was puzzles what to do with them.
I think I'll try this method on them and I think I start working on it tomorrow. (reminding myself: you already have three thousand spinning WIPs... but who cares? 😄)
Post a Comment